Showing posts with label Vegetable. Show all posts

Tuesday, August 19, 2014

Garden Galette


Is your garden bursting with zucchini yet?...Or your neighbor's garden?


I'm lucky, I don't currently have a garden, but I have a very generous neighbor that gives me zucchini from their garden when it's abundant; and I look forward to the donation every year! Sometimes I even think up and save recipes that contain zucchini specifically to make in late summer because even if my neighbors have a low turn out, it can easily be found at farmer's markets in abundance!


I love gardening, I even had an internship last summer where gardening was a focus for community involvement and outreach. There was a farmer's market that took place weekly with other's who shared the same love of fresh food and community. In all, it was a really neat experience, I was able to learn so much about growing fresh fruits and vegetables, but more importantly I also learned a lot about the community that revolved around the weekly market.


 And for funsies, here is a step-by-step photo-op: 

Finished!


 Now Enjoy!


Being surrounded by such vibrant and fresh food excited me to someday have a garden of my own! Until then, I thank my neighbors very much for their garden produce!!

Here's what I have made with it this year, a Suzy original:)


Garden Galett
3 zucchini, cut into ribbons
1/3 large Vadalia onion, chopped
1/2 cup Parmesan, grated.
Handful of fresh garden herbs (really any kind, I used basil, parsley, chive, and cilantro)
1 recipe for savory (buckwheat) crust

Preheat oven 350 degrees.
Prepare a cookie sheet with parchment and a light coating of cooking spray.
Roll out prepared dough for crust,
Slice zucchini into ribbons, I use a vegetable peeler to make thin slices length wise, and chop the onion and fresh herbs.
Layer vegetables evenly over the crust dough, alternating between vegetables and a sprinkling of cheese.
When done, layering vegetables, fold edges of dough over the vegetables the best you can. I use a fork to help out a bit. It doesn't need to be even, it will just look rustic, right? That's what I tell myself anyway.
Bake for 25-35 minutes. The time will depend on the amount of vegetable you manage to pile on top of the crust.
Allow to cool for a few minutes before cutting into slices.
Enjoy!


This galette is scrumptious straight out of the oven, or cooled. This means you could  make it ahead of time and store in the refrigerator before serving. Either way, it is a delightful garden treat!

Cheers,
     Suzy

Monday, July 28, 2014

Rain-y Day Food


I love to be in the kitchen when it's raining out. Chopping veggies with the window open so I can hear the rain... it's just so comforting. And this dish was the perfect cozy weather food. It's filling, colorful, warm, and quick to put together with ingredients you may already have in your pantry and fridge. This skillet meal IS BRIMMING with veggies, but I evened that out with some turkey bacon and pure maple syrup. I had to, I couldn't help myself.
Look at that satisfying pile of veg!

This is easily made with substituted veggies, anything you have on hand or like.
And next time I might try a savory version with a balsamic vinegar or reduction instead of the maple syrup, and toss in some spices. Spices was something I over looked this time around, I was thinking about it afterward and a pinch of nutmeg would have complemented the dish well.


Maple Sweet Potatoes and Brussels Sprouts

Yeild: 3-4 servings
1 lb. brussels sprouts, quartered
1 large sweet potato, diced
6 strips (turkey) bacon or about 2/3 cup meat/substitute of choice (it would be great with beans for a vegan version)
1 large onion, diced
2 T maple syrup
Salt and pepper to taste

1. Cook the turkey bacon and set aside. Allow to cool while the rest of the ingredients are cooking. When cool, chop into pieces.
(If you are making a vegan version, cook any meat substitute...even the beans! And set aside.)
2. Carmalize the onions in the bacon drippings that are left in the pan (for a vegan version use any oil you like, olive or even coconut would be great...you only need enough so the onions can caramalize and don't stick to the pan)
3. Add the chopped sweet potato.
4. When the sweet potato is still somewhat firm (does al dente only apply to pasta?) add the quartered brussels sprouts. Allow this to cook for a few minutes until tender.
5. Add the bacon or whatever you previously cooked back into the mix.
6. Drizzle the maple syrup over the cooked veggies. Stir, flip, mix the veggies...do whatever you have to to get that maple-y goodness distributed.
Salt and pepper to taste.
7. ENJOY

Cheers,
     Suzy

Monday, February 24, 2014

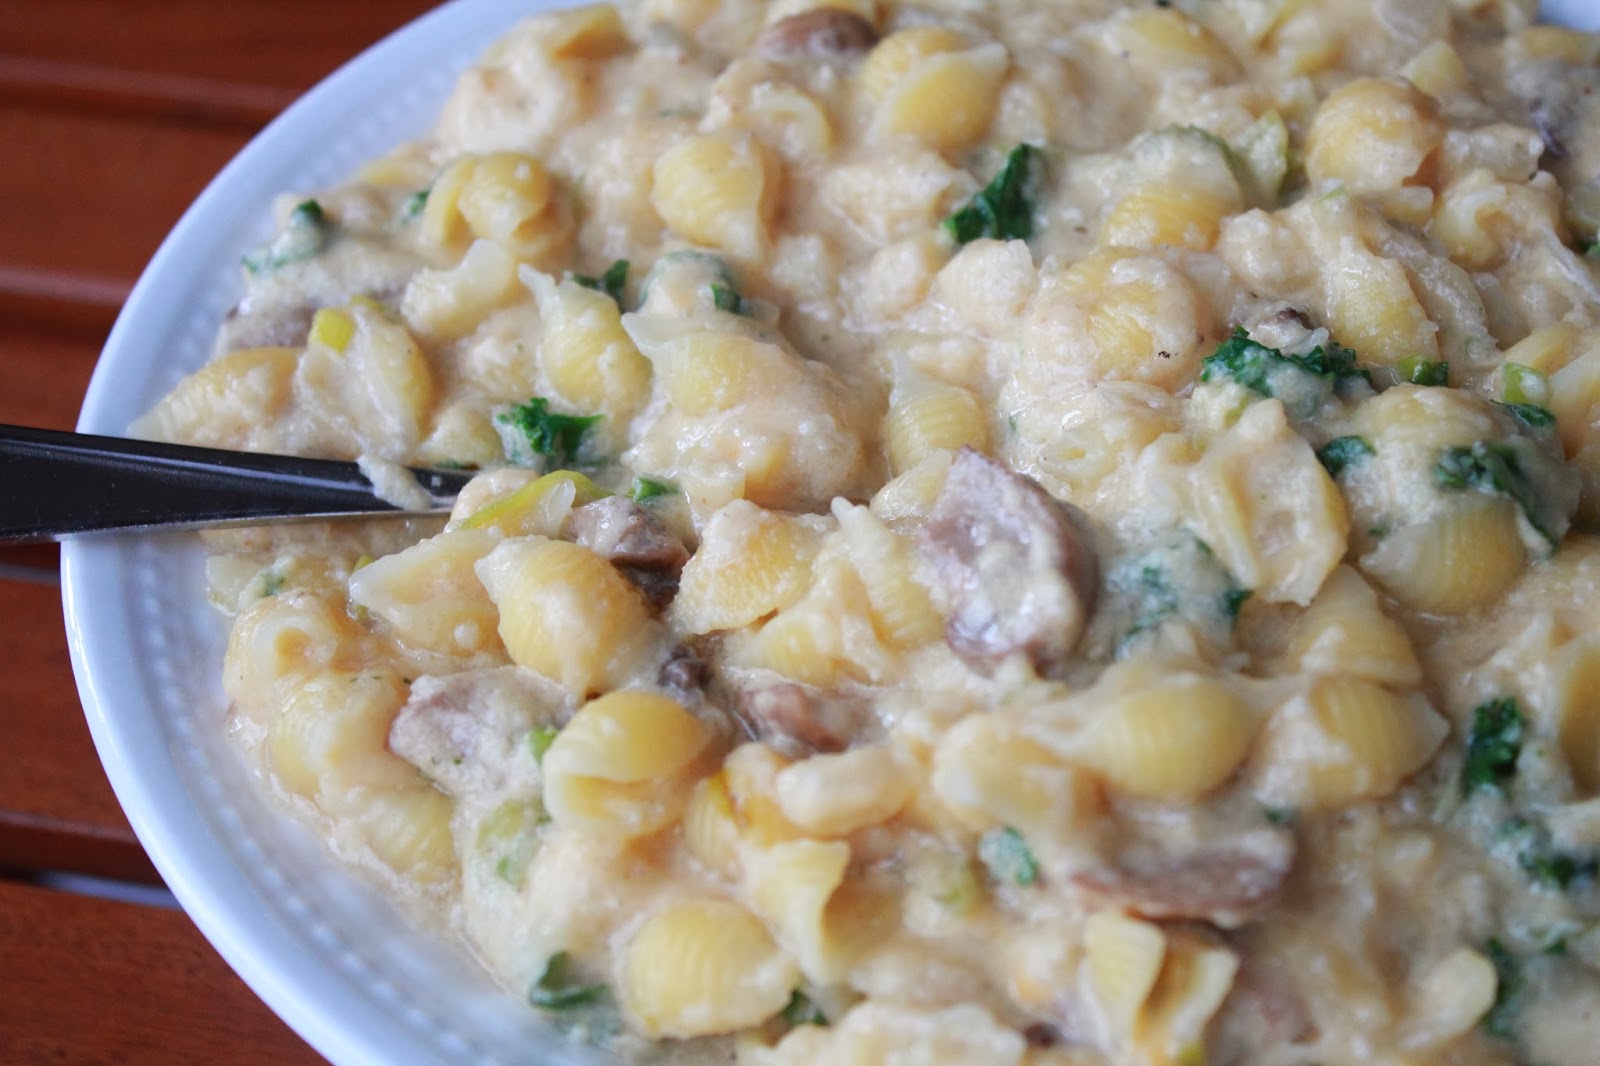
‘Macaroni and Cheese’


Things aren't always what they seem, and in gluten free cooking or baking, often times you need to be a bit inventive with your ingredients and use them thoughtfully. What I have found is that often times, after recreating a recipe it ends up more nutritious and just as tasty as the original. You see, it’s easy to make something taste good, the recipe for that is simple, add butter, sugar, and salt. These are the ingredients we crave as humans because they are quick and easy calories. We have evolved to crave these. The trick is to re-make a recipe without these ingredients and have it taste just as good. Yep, it’s possible, and I can’t think of a better recipe to healthi-fy and gluten-free-ize than a good old fashion bowl of homemade Macaroni and Cheese. Oh yes I did.

The really need thing about this recipe is that it not only is healthy and gluten free, but it is also vegan. Ta-da! It’s like magic. You just have to taste this recipe for yourself.
I'm don't usually like outright deceiving people, If you ask I will always let you know what ingredients make up a recipe, but I didn't come right out and say what this all was made of before my family tasted this 'macaroni and cheese'. Let me just say, it looks and smells divine so there isn't much of any convincing to taste going on. It is a "Grown-up" version of macaroni and cheese with more complex flavors than the blue cardboard box version you make while babysitting.
Here is a recipe that I myself, don’t think I will ever mess with. I think it is perfect the way it is, and I would be happy to eat it just the same again. This recipe makes a lot, and it’s really beefed up with all of the vegetables. It makes for a satisfying main dish, and leftovers that you can look forward to!

Yield: 6 servings.

Ingredients:
1 box of quinoa pasta
1 head cauliflower, steamed and pureed.
2 cups veggie cheese*
1 carton of mushrooms, any kind you like
½ onion, diced
1-2 leeks, washed and sliced
A handful or two of torn kale or spinach
1 Tablespoon olive oil
Salt and pepper, to taste

*I used a variety of Vegan veggie cheese that I bought pre-shredded at the supermarket. I found it in bags that were on display by hanging by organic cold items. If you are not vegan/vegetarian an want to use regular cheese of your choice, by all-means, feel free! Sometimes I have fun making dishes vegan and gluten free, just because of the challenge.

In a large saucepan, bring water to a boil, adding a pinch of salt to the water. Once boiling, add quinoa pasta noodles until al dente. Watch the noodles closely, if you have ever cooked with G-free noodles before, you know how quickly these cook. Follow the cooking time provided on the packet. Strain the noodles out and set aside, being sure to save some of the past water to use later in the recipe.
Cut the whole head of cauliflower into florets and steam them. Once cooled a bit, puree in a blender. Depending on the size of your blender you may have to puree the florets in batches. If you needed, add some pasta water to help puree. Store the puree in a large bowl until later.
Mix the ‘cheese’ into the cauliflower puree.
Heat a large skillet with the olive oil. Add the onions and leeks. Allow these to cook a few minutes before adding the mushrooms. Season with salt and pepper and allow these to cook down until the onions are slightly caramelized and golden. Once cooked, add the cooked noodles and kale or spinach. When the greens are cooked down, stir in the cheese and cauliflower puree until combined and thoroughly warmed.
Taste and Season with more salt and pepper if needed.
Serve in the skillet or you can transfer to a large serving bowl.

Have you made macaroni and cheese from scratch? What is your favorite pasta to use? I liked these little shells, mostly because all of the melted cheese and mushrooms fill them and you get plenty of flavor in every bite!

Cheers,

     Suzy


Tuesday, January 7, 2014

Coconut Rice and Roasted Curried Carrots

When the weather outside is frightful...

eat coconut rice and curried carrots.

That's not how it goes...but it sure is a delightful meal that will warm you up!
As a whole this dish, in my opinion is simply perfect. It cooks up really quickly with very little prep-work, so you can have a steaming bowl full on the table before the snow has melted off your boots from shoveling. I seasoned the carrots to be a tad spicy, but they were mellowed by the coconut rice. The coconut, curry, carry, and nutty brown rice flavors all meld together very well. I look forward to creating different variations of this dish, and pairing this coconut rice with other meals.
Curry-Roasted Carrots
8-10 carrots, washed and quartered lengthwise
1-2 t olive oil
1 t curry powder
salt and pepper to taste

Preheat oven to  400 degrees.
mix olive oil and curry powder in a bowl.
Add carrots.
Toss to coat.
Spread evenly on a cookie sheet (I did prepare my cookie sheet with cooking spray, just in case).
Sprinkle with salt and pepper.
Roast in oven for 20 minutes, or until done. They should be somewhat goldened on the outside and tender.

The great thing about roasted vegetables is that they are very versatile. You can use any vegetables and spices you have on hand and feel in the mood for that day. Feel free to change up this recipe (or any recipe for that matter) to suit your tastes. Please, play with your food.

 The key to this coconut rice is to toast the grains of rice before adding the liquid ingredients. This extra little step makes all the difference, and is step I've incorporated into many of my grain recipes. The toasting gives a nutty flavor that adds a warmth to rice.

Coconut Brown Rice
Serves: 4
Ingredients:
1 cup brown rice
1 cup light coconut milk
1.5 cups water
salt and pepper to taste

Toast the brown rice for a few minutes over medium heat in a medium saucepan, stirring frequently so the rice doesn't burn. Add the coconut milk, water, salt and pepper when you can smell a slight nuttiness from the rice. Turn the heat up to high and bring the mixture to a boil, then reduce the heat and allow the rice to simmer until the liquid is absorbed, about 15-20 minutes.

The roasted carrots are lightly based off of this recipe:
http://www.fullmeasureofhappiness.com/2011/09/19/herb-roasted-carrots/

Saturday, June 15, 2013

Sandwich 'Sushi' Roll

I saw an interesting idea in a magazine several years ago for parents who make their kids lunches, and it has stuck with me since. It was a way to mix up the usual sandwich, you know, and keep things interesting. Instead of giving the kids a roll up, you roll the tortilla and the fillings like you would sushi, and slice and serve them like the traditional Japanese fare. Brilliant!

I found some really good gluten free spinach tortillas that I have been enjoying, they are bendy and flexible, which I was quite impressed with. I used one as the seaweed paper, then filled it with cauliflower mash (instead of rice), a sprinkle of cheese, some squash that I had steamed and cut into strips, and a few spinach and basil leaves. You could really fill these with whatever you wanted, I just used what was in the fridge at the time. The squash really worked well though. I didn't use cauliflower "rice" because I thought that it would fall out when I tried cutting it, but I would still be interested in trying this method out.


1 tortilla
1/4 c cauliflower mash
sprinkle of cheese (I like Veggie cheese, mozzarella style)
vegetables of choice, thinly sliced lengthwise (and preferably steamed)
     such as squash, carrots, onion, bell peppers
Few spinach and/or basil leaves, torn
salt and pepper to taste

Cut the cauliflower into bite size florets  and seam by method of choice. I use the microwave and cover the dish of cauliflower with a second dish, but you could boil it in a saucepan until tender or even roast it in the oven at 400 degrees until golden. Then once the florets are cooled, you can throw them in a food processor and process until smooth, only adding a little bit of water if necessary. I like to add in some dried herbs while it is in the food processor, such as parsley or garlic. Then once it is out of the food processor, I top with salt and pepper, and maybe some paprika.

Place one tortilla on a microwavable plate and spread the cauliflower mash onto it evenly, leaving about a 1/2 inch space on the edges. Thinly sprinkle the cheese over the mash and place the vegetables in a strip closer to one of the ends of the tortilla, being sure to not over-stuff!
Place in the microwave and warm for about 30 seconds, this helps when rolling the sandwich. Top the open-face tortilla with a line of 5-6 spinach and/or basil leaves. and begin rolling like you would sushi, beginning at the end closest to the line of vegetables. The wrap should still be a bit warm while rolling, but it is best to wait a minute and let it cool a bit before you slice into little "sushi" rolls, so it has time to cool down a bit. Slice into 3/4'' pieces, and flip onto their sides to resemble sushi!

Enjoy!

This was an all veggie version, but it would be really fun to make a turkey-Swiss version, or even a peanut butter-banana roll. Oh, I think that one will have to be next!

Sometimes my mom would put notes in my lunchbox for school. I loved finding them in there among my juice box and "sandwich", which really wasn't a sandwich at all. I was very picky. I liked bread, lettuce, and cheese, but they had to be separate. So my lunches would consist of bread (with the crusts  cut off), washed lettuce, and string cheese. Clearly, I've become more adventurous ;)

What would/do you find in your lunch box?

Cheers,

Suzy

Monday, May 20, 2013

Sunshine Squash

I love leisurely mornings when you have time to contemplate what you really want to eat. Waltzing around the kitchen with a mug of your favorite tea, rummaging through the fridge and cabinets, looking for whatever your heart desires.

Healthy breakfasts are a great opportunity to use up any leftovers you may have, and that is how this gem of a breakfast came about.

I used to make sunshine toast at sleepovers when I was younger, and this recipe follows the same idea. Instead of using toast as a vessel for the egg like I used to, some leftover butternut squash is utilized.
I've always admired those in blog-sphere that share a rustic breakfast of veggies and egg. It always look like such a marvelous way to start your day. How much healthier can you get? Butternut squash is a great source of vitamins A and B, and fiber, while the egg cooked in the middle is an excellent form of lean protein. This breakfast is a great start to the day. Not to mention a single portion is low in calories, and full of flavor!

Sunshine Squash

Ingredients:
Steamed butternut squash, cut the raw squash into rounds by slicing the squash to form 'coins', then hollow out the seeded part once you reach it before proceeding to cut the rings. Steam the squash rounds.
1 egg
salt and pepper
Pam spray, oil, or butter to grease the pan

Place a steamed squash ring into a pan that has been lightly greased. Crack one egg into the middle of the ring. Allow the egg to cook until done. You may need to cover the pan so the top of the egg cooks evenly with the bottom.
Serve with some fruit and season with a little salt and pepper.

Instead of bread and squash, I have also seen this being done with pepper rings. That would be delicious!

What breakfasts have you constructed out of dinner leftovers?

Cheers,
     Suzy

Thursday, May 2, 2013

The Green Smoothie

Everyone has one.
They are stark in color, undoubtedly healthy, and deceptively tasty.
And unlike the green rugs of the 70's this shade will always be in style. Some may consider them the Holy Grail of Health, but many call them breakfast.
And they all have one thing in common, greens!

This is my go-to Green Smoothie.

Green Smoothies have become all the rage, and when you have a good one, you understand why. I like to use spinach in my smoothies, I think it blends up really well and even adds a creaminess. Two other necessary ingredients are green grapes and almond milk. Just add ice, blend, and you have yourself a darn good smoothie! But, I can never leave things well enough alone, and I generally have a grocery list of other add ins. That is the beauty of these dazzling drinks is that you can customize them to what you are in the mood for that day, or what is available.
The almond milk tones down the greens a bit, so it gives you a good excuse to add more spinach! The grapes add a nice touch of sweetness and an added boost of fiber, if you use green grapes it keeps with the green theme. I also REALLY like adding green figs when they are in season, they're just so tasty.

This isn't really a recipe, its more of a guideline that I tend to follow
Yield: 1 smoothie

Handful or two of spinach, or however much you are comfortable using
1 cup vanilla almond milk, sweetened or unsweetened
1 cup green grapes, with skin on
1/2 banana, frozen*
1/2 cup vanilla yogurt (optional)
2-3 green figs (optional)
1 cup of ice cubs


Add all ingredients into a blender and blend on high until smooth.


*It's helpful to peel and cut a few banana's in half before storing them in the freezer for easy smoothie making. If you don't have frozen bananas readily available, just add more ice.

Note: I have yet to do this, but I if you were to freeze the grapes it would help to thicken the smoothie. And if you're like me, I like my smoothies to be the consistency of to the point were I need a spoon to eat it.

Wednesday, March 20, 2013

Spinach, Feta, and Mushroom Omelet with Pesto

This omelet reminds me of that famed children's book...

...Something to do with Sam and Ham
How spring-y is all that green?

This is a great way to use up all those extra leafy-greens that you bought at the market because they looked so abundant and bountiful stacked on display at the supermarket! 
Truly, this was a really good omelet, probably the best I have ever made.
Unlike Sam, I didn't put ham in my omelet, but this is not to say you couldn't.
This delicious breakfast comes together really quickly, but the result is a good-for-you gourmet meal. the extra effort of mixing the pesto in with the egg whites isn't necessary, but I would be sure to put some in the omelet, if not drizzled over top when it is done cooking.

There is no such thing as too many greens!


What I liked most was the amount of leafy-greens that are packed into it. Everyone knows how good spinach is for you, and you can really fit a lot into this omelet because they are wilted down beforehand. This dish was not a problem being eaten for breakfast. ;)
How much healthier can you get? Not much.
This healthy breakfast is full of lean protein from the egg whites and the spinach provides vital nutritents such as Vitamin A, Beta-Carotein, Vitamin K, Iron, and even Calcium!

It may be a light and nutrient-dense breakfast option, but it's not lacking on flavor!

Spinach, Feta, and Mushroom Omelet with Pesto

yield: 1 FANTASTIC omelet

1/2 cup of egg whites
1 C spinach, torn
1/4 C mushrooms, chopped
1/4 diced sweet white onion
1 T feta cheese
1 T pesto of choice
salt and pepper to taste
cooking spray for the pan

Heat a pan on high and spray it with cooking spray.
Add the mushrooms and onion to the pan. Let these cook for a few minutes until the onions begin to brown. When they are browned, add the spinach and stir the mixture. The spinach should begin to wilt and release some water. Turn the heat down to low and let some of the water burn off. Transfer to a dish while the egg gets cooked.
Mix the egg whites with the pesto.
Spray your pan with more cooking spray before pouring the egg mix into your hot pan. Swirl the liquid egg around the pan a few times to thin it out. When it pulls itself away from the pan, flip it. Put the filling mixture on one half of the omelet, sprinkle with the feta cheese, and fold the other half over. Let this cook for a minute so the cheese can melt, before transferring to a plate to devour! 

As a kid I always wondered what made the eggs and ham green. I recently looked it up and after looking for recipes I have decided it was pesto.

Do leafy-greens ever make it onto your breakfast plate?


Cheers,
     Suzy

Monday, March 4, 2013

Skillet Veggie {GF} Pasta

The first time I cooked gluten free noodles they disintegrated.
One of my first lessons in Gluten free cooking was that the noodles tend to cook quicker than their wheat-filled counterparts.
This particular kind only needed to be boiled for 4 minutes!
The shorter cooking time is great though because they can be an afterthought when you are preparing a  dish. It makes for a very quick and tasty lunch.
Here I prepared all the veggies and the 'cream sauce' before beginning to boil the noodles!

I wanted this pasta to be light and healthy, and that is exactly what it turned out to be! It is full of colorful vegetables! Leeks and onions always pair so well together, and the sweet potato lends such a great flavor.
Even the 'cream sauce' is light and healthy, made from cashews and oatmeal. Yes, oatmeal!

1 sweet potato, diced into 1/2 inch cubes
2 leeks, thinly sliced, washed, and separated.
1/3 Sweet white onion, diced into small pieces
2 handfuls of greens, roughly chopped. (I used a spring mix, but kale, spinach, or arugula would be lovely)
1 box uncooked {GF} pasta (I used a rice brand, but I really like noodles made with quinoa)
water to cook the noodles

1/2 cup cashews
1/4 cup dry oatmeal

salt and pepper
oregano, Italian seasoning, thyme


Prepare all veggies and set them aside.
Spray a large skillet with non-stick cooking spray and heat on high heat.
Toss the sweet potato in the warmed skillet and turn the heat down to medium, cover and let cook until browned on the outside and tender, ~ 10 min.
Start to boil a pot of water for the noodles. I like to season the water with a pinch of salt and sometimes even a bit of the other seasonings that I'm using, like the oregano.
Meanwhile, put the oats, and cashews in a food processor and process on high until the mixture starts to stick together in the bottom of the food processor. Before I took it out, I added about 2 T of the (mostly) cooked sweet potato pieces and a pinch of salt, pepper, and oregano. The mix should be very thick, like chunky peanut butter. 
Add the leeks and onions to the skillet with sweet potato, season to taste.
Add the noodles to the boiling water. Now, watch them closely! You want them to be al dente, so read the box for cooking directions.
Continue to watch and stir the veggies while the noodles are cooking.
When the noodles are done, scoop them out of the water and into the skillet, you will want to (be like Rachel Ray and) reserve the pasta water, this is for the 'cream sauce' that we will attend to in a minute.
Stir the veggie and noodle mix.
Add pasta water into the 'cream' mixture until it takes on the consistency of...well, cream. You can always add more water, so start with just a bit and add more. Pour this mixture over the noodles and vegetables and toss together. 
At the last minute add in the spinach and stir, allowing it to wilt.
Serve warm!

Notes:

I ate mine atop a bed of more greens, and it was satisfying.
There is nothing that needs to be kept cold, making this a really great lunch-box meal!

This did make a lot, and I was glad because I knew there would be left overs. I get excited when I make something and there are left overs. Mostly because I tend to have a problem with putting something away if there are only a few bites left. I'll just eat it :)
'Cream Sauce' adapted from Aromatic Cooking
Oh, one more suggestion: We discovered this was complimented really well with freshly grated Parmesan on top. Of course, if you are vegan, you could substitute nutritional yeast, or I also really like the 'veggie cheese' that is available at most supermarkets.
Yummy leftovers!

What leftovers do you look forward to finding in your fridge?