Showing posts with label Retro. Show all posts

Thursday, July 3, 2014

Mom's Banana Cake

When I think of birthdays, one of the first thoughts that come to mind is of banana cake. My mom used to make banana cake with cream cheese frosting for birthdays when I was a kid, and because of that I have a special sweet spot for mom's homemade banana cake. It wasn't until years later that I learned she liked making banana cakes for our birthdays because she used to eat Sara Lee's banana cake for birthdays when she was a kid, and was trying to recreate the cake! She tried several before baking up this one, and it is SO GOOD! It's cake at it's finest in my opinion, perfectly cake-y and scrumptious. I'm sure the Sara Lee cake is wonderful, but in my opinion Mom's is better because her version is gluten free, just for me! :) Ha!

This all being said, I can NOT believe I didn't take a picture of the final product! It was eaten too quickly to get a good one in, and in all honesty I was busy trying to make a banana cake of my own (check out the next post!). It was made in the morning before company, and polished off right after lunch. G. O. N. E. All done. But, the next chance I get, there will be so many pictures up of this cake, it will be overwhelming.

I've never had the Sara Lee Cake, nor will I get that chance because for starters it's no longer made and it was of course made with wheat; but with Mom's cake I'm not missing out on anything. According to her and other relatives however, it's pretty close to the original beloved Sara Lee Cake.

Mom's Best Banana Cake - Gluten Free
1/2 vegetable shortening
1 1/2 cups sugar
3 eggs, separated
1 cup or 3 medium mashed bananas
1/2 cup buttermilk (or 1/2 cup milk + 1 t lemon juice)*
3/4 cup sorghum flour
3/4 cup potato starch
3/4 cup tapioca
3/4 t xanthan gum
1 t baking soda
1 t baking powder
1 t salt

Cream Cheese Frosting

Preheat the oven 350 degrees Fahrenheit. Prepare a 9x13 " pan (or for a layered cake, 2 9" round pans) with cooking spray and a little granulated sugar.
*If you are using the buttermilk substitute, mix any milk of your choice with the lemon juice now.
Cream together the shortening and sugar. Mix in the egg yolks, then mashed banana and buttermilk.
Combine the flours, baking soda, baking powder, and salt. Now add this flour mixture to the banana mixture and combine until there aren't any more lumps.
Separately, in a new bowl, beat the egg whites until they form stiff peaks.
Carefully fold the whipped egg whites into the banana batter until completely incorporated.
Pour the batter into the prepared baking pan(s) and bake for about 30 minutes until the cake(s) are golden brown on top and a toothpick inserted in the center comes out clean.
Let the cake(s) cool in the pan before removing or topping with cream cheese frosting.

Here's one for the tips and trick's category, instead of flouring the greased cake pan so the cake doesn't stick, on special occasions like this I will sprinkle granulated sugar around the edges. The thin coating of sugar will crystallize a bit when baking and form a little crust around each and every slice of cake, making it just that much more special.

 Like This!

I was also pretty proud of the egg whites that were whipped into perfect little peaks. I think I'm finally getting it down, the trick is to just not quit....they'll get there.


I said this cake was delectable and gluten free, neither one of those things make it health food. Though I like to focus this blog around healthy AND gluten free eats, I also recognize not everyone is a fan of chia seeds and mashed chickpeas in their food like me. This being said, I am a proponent of the "everything in moderation" campaign; and especially when baking for company, using sugar and (as much as it pains me,) vegetable shortening is okay once in awhile.

But be on the lookout, I have quite a few super healthy recipes coming up! Most of them probably contain either chia seeds or chickpeas...if we are lucky, maybe even both! :D

What is your favorite birthday dessert?

Cheers,
     Suzy

Thursday, June 5, 2014

Blueberry Buckles and other Fruity Things

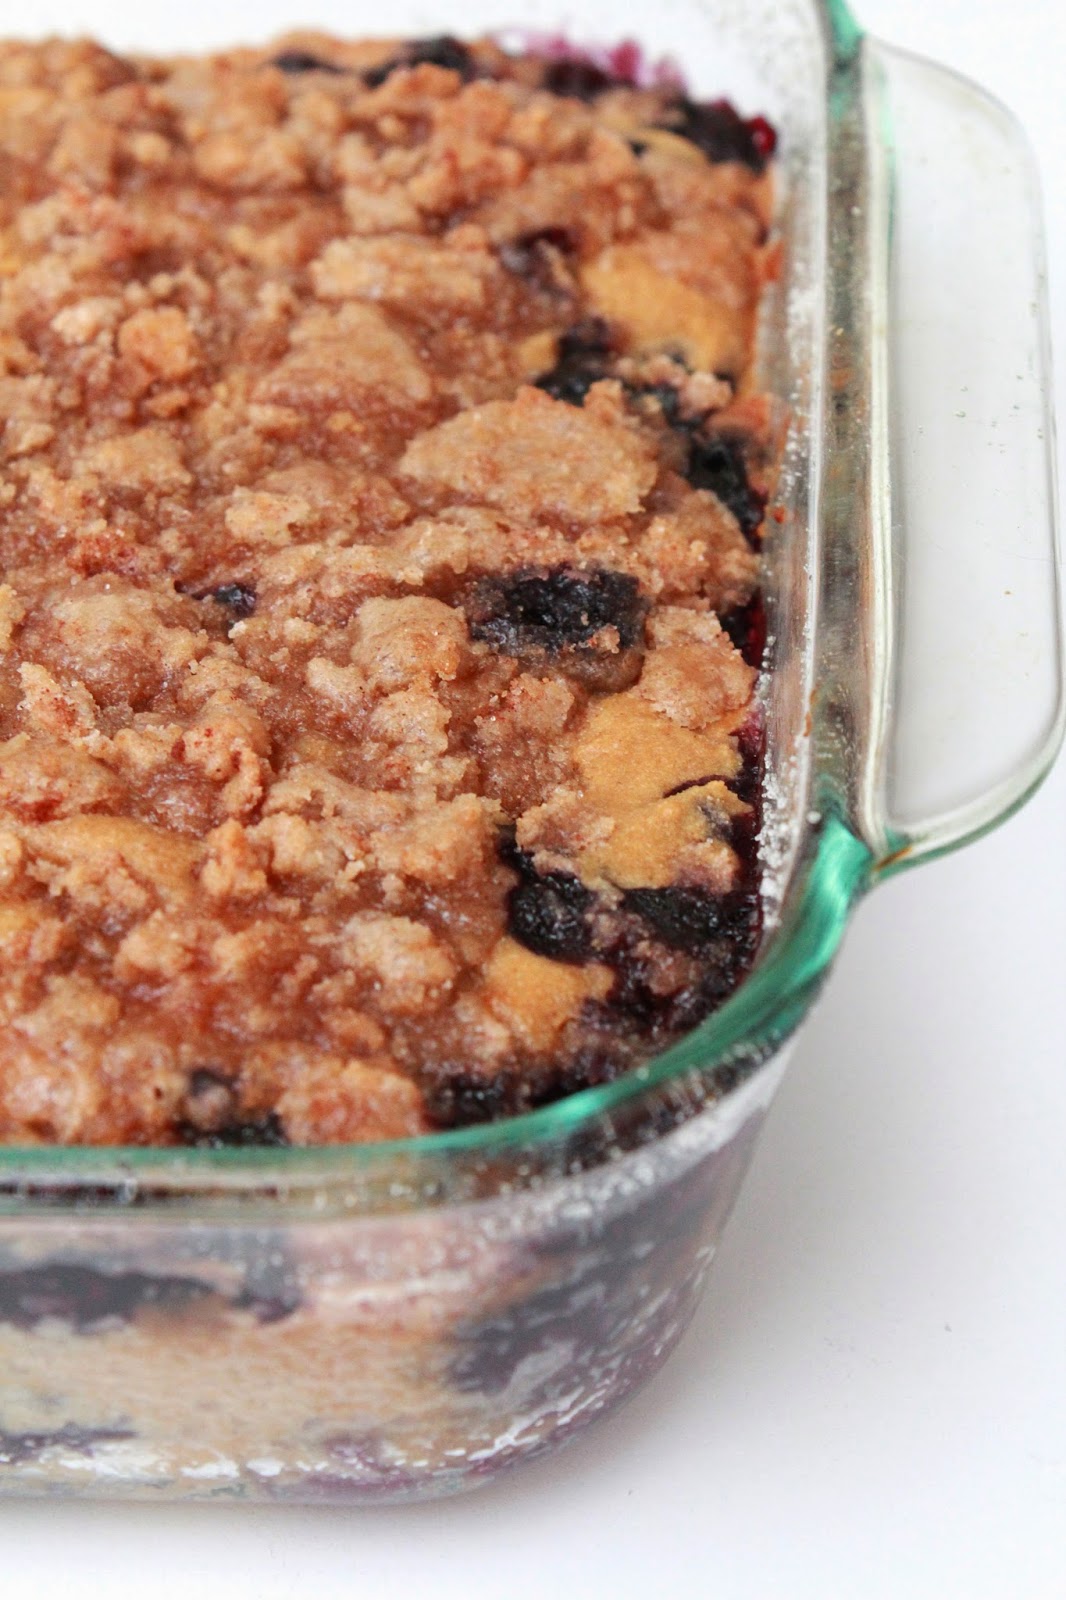
Something I have realized over my casual culinary career, that never ceases to surprise me, is how good fresh fruit and brown sugar taste together.  If a recipe calls for those two things it probably won't be bad. I love baking fruity desserts, and I was surprised when I realized how few (read: zero) I had on this blog. BUT this is about to change my friends because, this Blueberry Buckle encompasses both fresh fruit and brown sugar, and it tastes amazing (I already tested it for you,  no guess work on this recipe!).

A buckle  is similar to coffee cake with fruit baked in the cake batter and topped with a sugar-y cinnamon-y topping. After the buckle is baked, the cake can be seen through cracks made by the topping, and it looks as though the entire cake itself had buckled. This is one theory behind why this delicious dessert is called a buckle, but whatever you call it, I'd eat it.
 I served this dessert along side freshly whipped cream and a Bursting Blueberry Compote, because more blueberries is never a bad thing. Serve this to some favorite company on a temperate summer evening, and I can guarantee you will have a good afternoon in the making.

Blueberry Buckle

Yeild: 1 9x9 inch dish (~9 portions)
Cake:
1/2 cup sugar
1/4 cup brown sugar
1/4 cup butter of choice (I use a yogurt butter from a tub)
1 large egg (or egg substitute)
1/2 cup milk of choice
1/4 cup Plain Greek yogurt (or sour cream)
2 cups GF flour blend:
       1/2 cup tapioca starch*
       1/2 cup brown rice flour*
       1 cup sorghum
       (optional) 1 t xanthan gum
2 t baking powder
1/2 t salt
2 cups blueberries (both fresh and frozen work, you could even try raspberries or your favorite fruit!)

Topping:
1/3 cup sugar
1/4 cup brown sugar
1/3 cup GF flour (brown rice)
1 Tablespoon cinnamon
1/4 cup butter of choice

1. Preheat oven 375 degrees F, and butter (and sugar-coat) the edges of a 9x9 inch pan
2. For the Cake: cream the butter and sugars until fluffy. Add the egg, milk and yogurt and mix well.
3. Combine the flours and mix in the baking powder and salt. 
4. Incorporate the dry mix into the wet ingredients.
5. Gently fold in the blueberries.
6. Pour the batter into the prepared pan.
7. Combine all the topping ingredients and evenly distribute by crumbling it between your fingers ontop of the cake batter.
8. Bake for 35 minutes until golden brown, and a toothpick comes out clean.

This is wonderful served either warm or cold.
I served it at room temp with this freshly whipped cream and this Bursting Blueberry Compote, delish!
BUT, if I were to serve it warm from the oven, I think vanilla ice cream would be a great accompaniment.

*Notes: next time I think I would like to use arrowroot starch in place of the tapioca and oatmeal flour in place of the brown rice, just because I like these two ingredients (personal preference) and I tend to have these more readily on-hand. But I can't attest to the results because I haven't make it yet...hmmm, is that an excuse I now have to make this again? :)
And a blueberry lemon/orange version of a buckle might be nice, by adding a teaspoon of zest to the cake batter before baking!

Cheers,
      Suzy


Monday, February 24, 2014

‘Macaroni and Cheese’


Things aren't always what they seem, and in gluten free cooking or baking, often times you need to be a bit inventive with your ingredients and use them thoughtfully. What I have found is that often times, after recreating a recipe it ends up more nutritious and just as tasty as the original. You see, it’s easy to make something taste good, the recipe for that is simple, add butter, sugar, and salt. These are the ingredients we crave as humans because they are quick and easy calories. We have evolved to crave these. The trick is to re-make a recipe without these ingredients and have it taste just as good. Yep, it’s possible, and I can’t think of a better recipe to healthi-fy and gluten-free-ize than a good old fashion bowl of homemade Macaroni and Cheese. Oh yes I did.

The really need thing about this recipe is that it not only is healthy and gluten free, but it is also vegan. Ta-da! It’s like magic. You just have to taste this recipe for yourself.
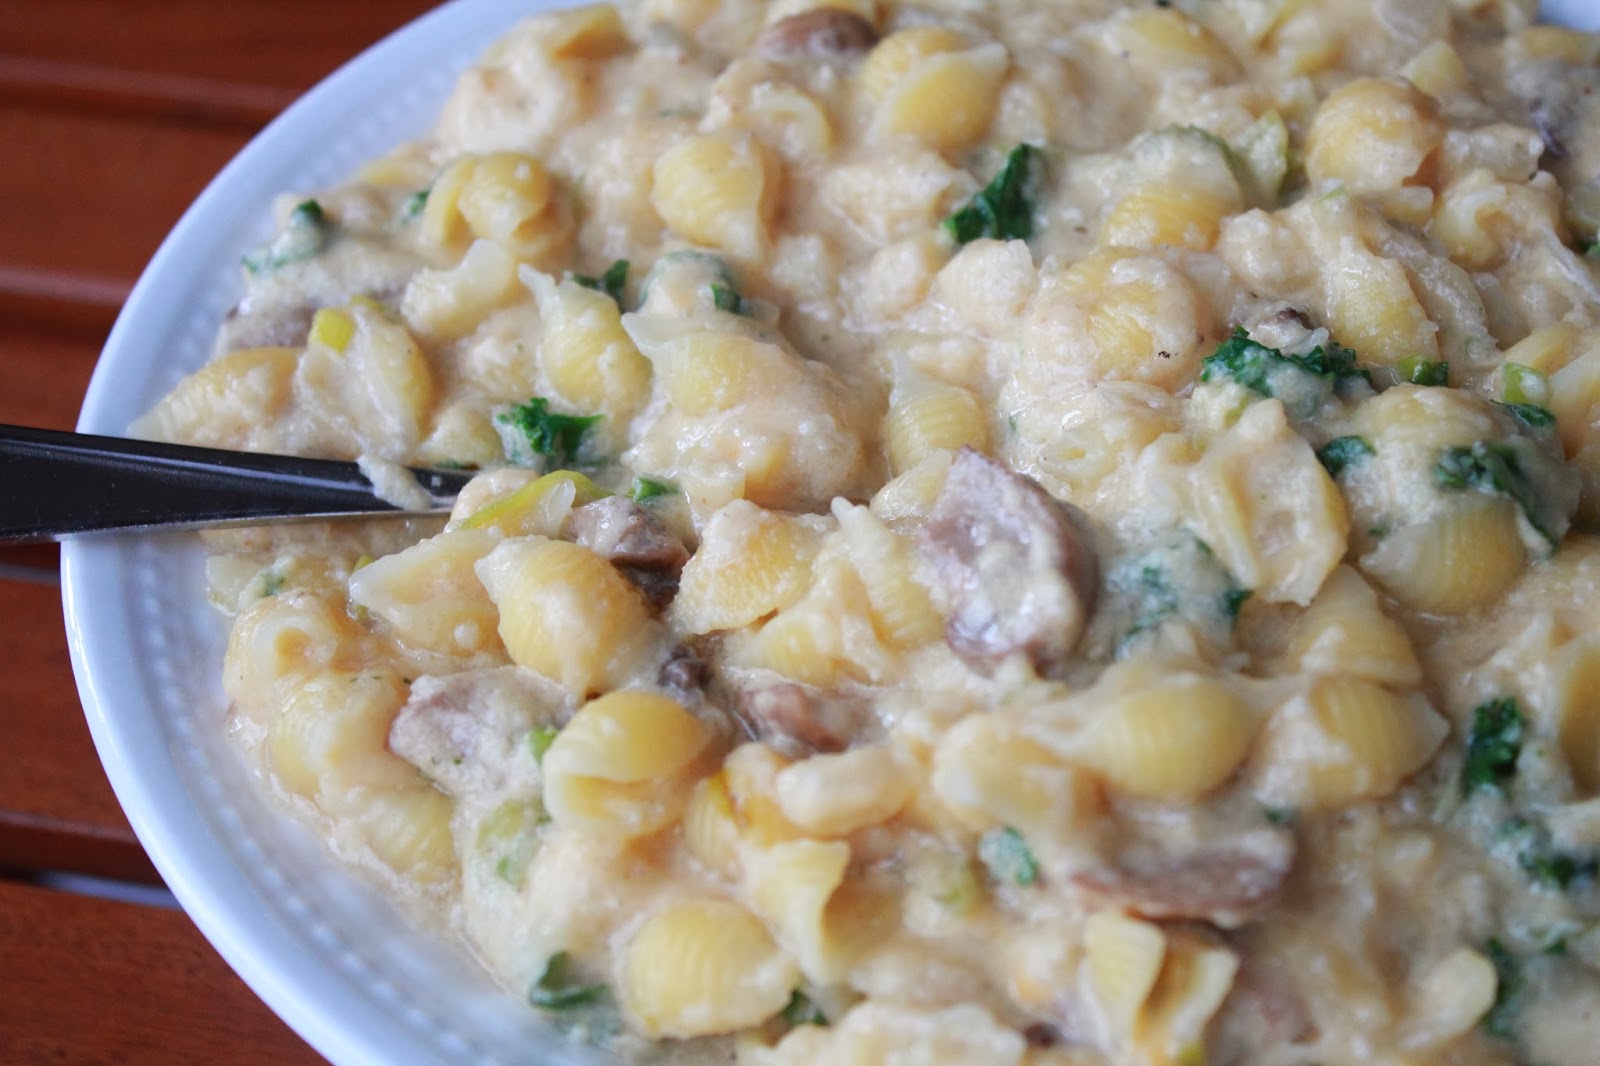
I'm don't usually like outright deceiving people, If you ask I will always let you know what ingredients make up a recipe, but I didn't come right out and say what this all was made of before my family tasted this 'macaroni and cheese'. Let me just say, it looks and smells divine so there isn't much of any convincing to taste going on. It is a "Grown-up" version of macaroni and cheese with more complex flavors than the blue cardboard box version you make while babysitting.
Here is a recipe that I myself, don’t think I will ever mess with. I think it is perfect the way it is, and I would be happy to eat it just the same again. This recipe makes a lot, and it’s really beefed up with all of the vegetables. It makes for a satisfying main dish, and leftovers that you can look forward to!

Yield: 6 servings.

Ingredients:
1 box of quinoa pasta
1 head cauliflower, steamed and pureed.
2 cups veggie cheese*
1 carton of mushrooms, any kind you like
½ onion, diced
1-2 leeks, washed and sliced
A handful or two of torn kale or spinach
1 Tablespoon olive oil
Salt and pepper, to taste

*I used a variety of Vegan veggie cheese that I bought pre-shredded at the supermarket. I found it in bags that were on display by hanging by organic cold items. If you are not vegan/vegetarian an want to use regular cheese of your choice, by all-means, feel free! Sometimes I have fun making dishes vegan and gluten free, just because of the challenge.

In a large saucepan, bring water to a boil, adding a pinch of salt to the water. Once boiling, add quinoa pasta noodles until al dente. Watch the noodles closely, if you have ever cooked with G-free noodles before, you know how quickly these cook. Follow the cooking time provided on the packet. Strain the noodles out and set aside, being sure to save some of the past water to use later in the recipe.
Cut the whole head of cauliflower into florets and steam them. Once cooled a bit, puree in a blender. Depending on the size of your blender you may have to puree the florets in batches. If you needed, add some pasta water to help puree. Store the puree in a large bowl until later.
Mix the ‘cheese’ into the cauliflower puree.
Heat a large skillet with the olive oil. Add the onions and leeks. Allow these to cook a few minutes before adding the mushrooms. Season with salt and pepper and allow these to cook down until the onions are slightly caramelized and golden. Once cooked, add the cooked noodles and kale or spinach. When the greens are cooked down, stir in the cheese and cauliflower puree until combined and thoroughly warmed.
Taste and Season with more salt and pepper if needed.
Serve in the skillet or you can transfer to a large serving bowl.

Have you made macaroni and cheese from scratch? What is your favorite pasta to use? I liked these little shells, mostly because all of the melted cheese and mushrooms fill them and you get plenty of flavor in every bite!

Cheers,

     Suzy


Tuesday, February 11, 2014

Broiled Grapefruit?

Sounds strange, tastes fantastic!
Its a great way to jazz up a simple breakfast.
Before

After!


There are a lot of variations out there for this tasty treat, but they pretty much are all the same, grapefruit halves sprinkled with sugar and baked in the oven until the top is caramelized. Sounds good to me! :)

Broiled Grapefruit

Yeild: 4 halves

2 grapefruits, halved
4 Tablespoons sugar, brown sugar, vanilla sugar
sprinkle of any spice you like: cinnamon, nutmeg, cardamom, clove
---
Greek yogurt
Honey
Granola

1. Preheat your oven broiler. 
2. Halve your grapefruit. You can make a base oh your grapefruit so they don't roll around on a baking sheet by slicing off part of the bottom peel around the stem of the fruit.
3. In a bowl, combine sugar and spices.
4. Place the grapefruit halves face-up on a rimmed baking sheet.
5. Sprinkle about 1 Tablespoon of sugar and spice on each fruit half.
6. Broil 7-10 minutes, until the sugar has melted and turned a little golden.
7. Remove from oven and allow to cool for a few minutes before serving plain or with yogurt, honey, and granola.

Look how lovely and pink! Just makes for a happy morning!


I enjoyed these with some Greek yogurt and granola.

Mmmm, enjoyed until the very last drop!

I think this recipe is the epitome of sugar and spice and everything nice.
And look! It's perfectly pink, just in time for Valentine's Day!

Cheers,     Suzy