Showing posts with label Summer. Show all posts

Sunday, October 19, 2014

My Favorite Pie Crust

Since being gluten free I've tried my hand at making a few pies, and I have finally settled on my favorite version! This pie crust isn't the buttery and flaky crust that looks like phyllo dough., this crust is more...cakey, I suppose. It has a soft texture with a crumb. It might make for a less-than presentable slice, but after tasting it, no-one will be complaining about it's presentation.


Pro Tip: Occasionally I will be making a pie, and while I have all the ingredients out, I will make a few to freeze for later. I individually wrap them up in saran wrap and just pile them in the freezer to chill for whatever or whenever I need it.

What I really like about this crust recipe is how versatile it can be. You can use your favorite flours and feel free to make it as sweet or even savory as you want! The crust can even be made vegan with a vegan replacement for the butter and eggs. I have definitely done this in the past, and am happy to report that flax eggs do work well!

1 flax egg =  1 T flax + 3 T hot water


I will often cut out some of the sugar if I am going to freeze the dough,  just because I don't know what it will be made for at a later date, and I may not want it that sweet if it is being used for a savory quiche or something. If the dough will be used for pie, after letting it thaw and I'm rolling it out, I will just add a bit more sugar or syrup on it.


Suzy's Favorite Pie Crust
Yield: 1 crust (double for pie that requires a top and bottom crust)

1 1/2 cup finely ground oatmeal flour
1/2 cup butter or 1/4 cup coconut oil
2 eggs, or equivalent egg replacement (flax eggs do work!)*
2 t baking powder
3-4 T honey/agave/rice syrup
splash of vanilla extract
salt
cinnamon or other spices, if you desire

*Flax eggs do work, combine 2 T flax seed meal + 6 T hot water (allow to sit before combining to other ingredients. I actually prefer the taste and texture of the flax egg to the normal eggs, there's a subtle nuttiness:)
Combine all ingredients in a food process or a large bowl and combine until a dough forms. 
You can freeze the dough now to use later, if you like. Or fill it with your favorite pie fillings and bake!
You need to do a bit of patch-work to lay this crust out, I don't bother rolling it out into the pie dish, I just plop the whole dough ball down and flatten it out using floured (sorghum or a starch) hands.
Fill with favorite filling
Bake at 350° F for 35-40 minutes until the crust is lightly browned. If you pre-bake the crust before adding a filling, the crust won't need to bake as long, maybe 15 to 20 minutes.


Cheers,     Suzy

Tuesday, August 19, 2014

Garden Galette


Is your garden bursting with zucchini yet?...Or your neighbor's garden?


I'm lucky, I don't currently have a garden, but I have a very generous neighbor that gives me zucchini from their garden when it's abundant; and I look forward to the donation every year! Sometimes I even think up and save recipes that contain zucchini specifically to make in late summer because even if my neighbors have a low turn out, it can easily be found at farmer's markets in abundance!


I love gardening, I even had an internship last summer where gardening was a focus for community involvement and outreach. There was a farmer's market that took place weekly with other's who shared the same love of fresh food and community. In all, it was a really neat experience, I was able to learn so much about growing fresh fruits and vegetables, but more importantly I also learned a lot about the community that revolved around the weekly market.


 And for funsies, here is a step-by-step photo-op: 

Finished!


 Now Enjoy!


Being surrounded by such vibrant and fresh food excited me to someday have a garden of my own! Until then, I thank my neighbors very much for their garden produce!!

Here's what I have made with it this year, a Suzy original:)


Garden Galett
3 zucchini, cut into ribbons
1/3 large Vadalia onion, chopped
1/2 cup Parmesan, grated.
Handful of fresh garden herbs (really any kind, I used basil, parsley, chive, and cilantro)
1 recipe for savory (buckwheat) crust

Preheat oven 350 degrees.
Prepare a cookie sheet with parchment and a light coating of cooking spray.
Roll out prepared dough for crust,
Slice zucchini into ribbons, I use a vegetable peeler to make thin slices length wise, and chop the onion and fresh herbs.
Layer vegetables evenly over the crust dough, alternating between vegetables and a sprinkling of cheese.
When done, layering vegetables, fold edges of dough over the vegetables the best you can. I use a fork to help out a bit. It doesn't need to be even, it will just look rustic, right? That's what I tell myself anyway.
Bake for 25-35 minutes. The time will depend on the amount of vegetable you manage to pile on top of the crust.
Allow to cool for a few minutes before cutting into slices.
Enjoy!


This galette is scrumptious straight out of the oven, or cooled. This means you could  make it ahead of time and store in the refrigerator before serving. Either way, it is a delightful garden treat!

Cheers,
     Suzy

Monday, July 28, 2014

Rain-y Day Food


I love to be in the kitchen when it's raining out. Chopping veggies with the window open so I can hear the rain... it's just so comforting. And this dish was the perfect cozy weather food. It's filling, colorful, warm, and quick to put together with ingredients you may already have in your pantry and fridge. This skillet meal IS BRIMMING with veggies, but I evened that out with some turkey bacon and pure maple syrup. I had to, I couldn't help myself.
Look at that satisfying pile of veg!

This is easily made with substituted veggies, anything you have on hand or like.
And next time I might try a savory version with a balsamic vinegar or reduction instead of the maple syrup, and toss in some spices. Spices was something I over looked this time around, I was thinking about it afterward and a pinch of nutmeg would have complemented the dish well.


Maple Sweet Potatoes and Brussels Sprouts

Yeild: 3-4 servings
1 lb. brussels sprouts, quartered
1 large sweet potato, diced
6 strips (turkey) bacon or about 2/3 cup meat/substitute of choice (it would be great with beans for a vegan version)
1 large onion, diced
2 T maple syrup
Salt and pepper to taste

1. Cook the turkey bacon and set aside. Allow to cool while the rest of the ingredients are cooking. When cool, chop into pieces.
(If you are making a vegan version, cook any meat substitute...even the beans! And set aside.)
2. Carmalize the onions in the bacon drippings that are left in the pan (for a vegan version use any oil you like, olive or even coconut would be great...you only need enough so the onions can caramalize and don't stick to the pan)
3. Add the chopped sweet potato.
4. When the sweet potato is still somewhat firm (does al dente only apply to pasta?) add the quartered brussels sprouts. Allow this to cook for a few minutes until tender.
5. Add the bacon or whatever you previously cooked back into the mix.
6. Drizzle the maple syrup over the cooked veggies. Stir, flip, mix the veggies...do whatever you have to to get that maple-y goodness distributed.
Salt and pepper to taste.
7. ENJOY

Cheers,
     Suzy

Thursday, June 5, 2014

Blueberry Buckles and other Fruity Things

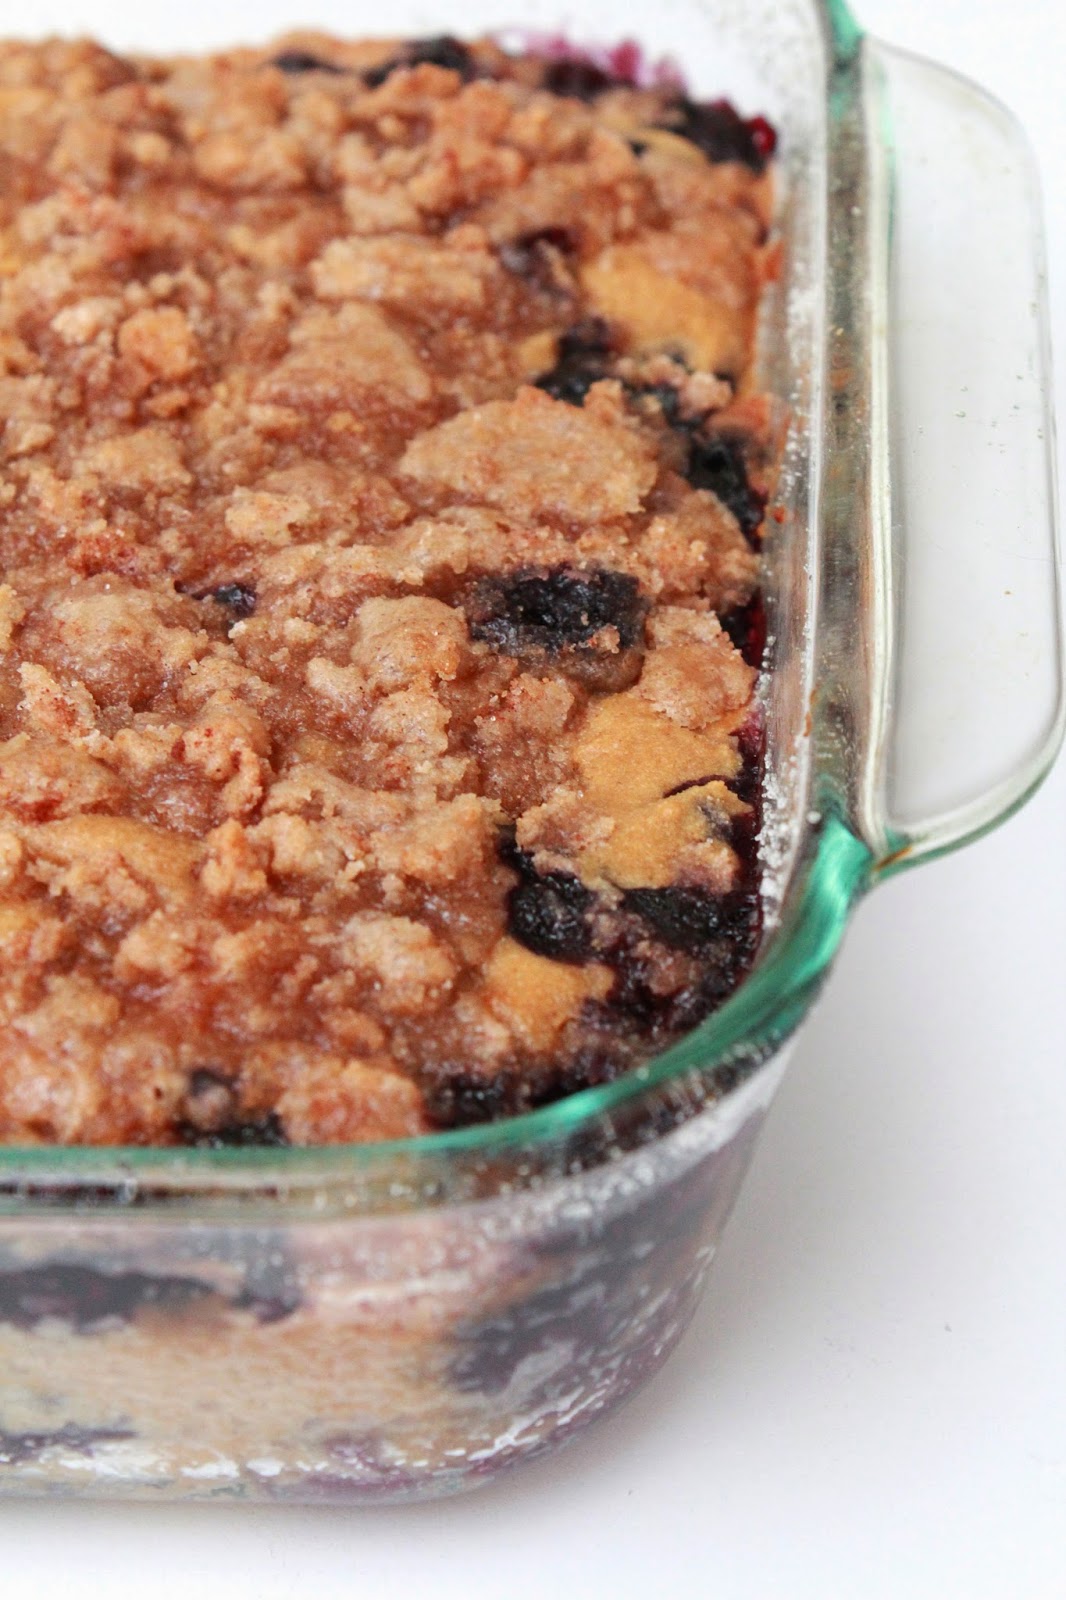
Something I have realized over my casual culinary career, that never ceases to surprise me, is how good fresh fruit and brown sugar taste together.  If a recipe calls for those two things it probably won't be bad. I love baking fruity desserts, and I was surprised when I realized how few (read: zero) I had on this blog. BUT this is about to change my friends because, this Blueberry Buckle encompasses both fresh fruit and brown sugar, and it tastes amazing (I already tested it for you,  no guess work on this recipe!).

A buckle  is similar to coffee cake with fruit baked in the cake batter and topped with a sugar-y cinnamon-y topping. After the buckle is baked, the cake can be seen through cracks made by the topping, and it looks as though the entire cake itself had buckled. This is one theory behind why this delicious dessert is called a buckle, but whatever you call it, I'd eat it.
 I served this dessert along side freshly whipped cream and a Bursting Blueberry Compote, because more blueberries is never a bad thing. Serve this to some favorite company on a temperate summer evening, and I can guarantee you will have a good afternoon in the making.

Blueberry Buckle

Yeild: 1 9x9 inch dish (~9 portions)
Cake:
1/2 cup sugar
1/4 cup brown sugar
1/4 cup butter of choice (I use a yogurt butter from a tub)
1 large egg (or egg substitute)
1/2 cup milk of choice
1/4 cup Plain Greek yogurt (or sour cream)
2 cups GF flour blend:
       1/2 cup tapioca starch*
       1/2 cup brown rice flour*
       1 cup sorghum
       (optional) 1 t xanthan gum
2 t baking powder
1/2 t salt
2 cups blueberries (both fresh and frozen work, you could even try raspberries or your favorite fruit!)

Topping:
1/3 cup sugar
1/4 cup brown sugar
1/3 cup GF flour (brown rice)
1 Tablespoon cinnamon
1/4 cup butter of choice

1. Preheat oven 375 degrees F, and butter (and sugar-coat) the edges of a 9x9 inch pan
2. For the Cake: cream the butter and sugars until fluffy. Add the egg, milk and yogurt and mix well.
3. Combine the flours and mix in the baking powder and salt. 
4. Incorporate the dry mix into the wet ingredients.
5. Gently fold in the blueberries.
6. Pour the batter into the prepared pan.
7. Combine all the topping ingredients and evenly distribute by crumbling it between your fingers ontop of the cake batter.
8. Bake for 35 minutes until golden brown, and a toothpick comes out clean.

This is wonderful served either warm or cold.
I served it at room temp with this freshly whipped cream and this Bursting Blueberry Compote, delish!
BUT, if I were to serve it warm from the oven, I think vanilla ice cream would be a great accompaniment.

*Notes: next time I think I would like to use arrowroot starch in place of the tapioca and oatmeal flour in place of the brown rice, just because I like these two ingredients (personal preference) and I tend to have these more readily on-hand. But I can't attest to the results because I haven't make it yet...hmmm, is that an excuse I now have to make this again? :)
And a blueberry lemon/orange version of a buckle might be nice, by adding a teaspoon of zest to the cake batter before baking!

Cheers,
      Suzy


Bursting Blueberry Compote

This is by no means an exact recipe, but the flavors complement each other so well! But please adjust the ingredients according to your own tastes!


2 cups Blueberries (fresh or frozen)
2 t Orange Zest
1/2 t Ground Clove
1/4 t Ground Cardamom
Splash of vanilla extract
water

Put the blueberries in a saucepan and add the water and orange zest. Allow the mixture to simmer for about half an hour until it is reduced and the blueberries have burst. Add the ground clove, cardamom, and vanilla extract and stir.
Take of the heat and serve warm or store in the refrigerator until ready to eat!


This is good warm, cold, or re-warmed in the microwave. Serve on top of yogurt, ice cream, cake, or oatmeal...or eat it straight with a spoon. I'll admit, I did that.

Cheers,
      Suzy

Saturday, May 10, 2014

Mango Lassi, Sunshine in a Glass

Did you know you can eat the skin of a mango?  You can! I happen to like the taste, quite a bit actually. I found out that the skin was edible in high school when my friend who spends her summers in India told me you could. I was cutting one up as a snack to have with tea, a favorite pass time after school (weren't we classy!?), when I served her just the sweet orange inside, and she gave me a funny look. She then told me how in India people will eat mangoes like apples, skin and all. Of course I immediately had to try it and was soon gnawing on the tough, bright green, red, and freckled-yellow peel. I am so glad that she informed me of this, I always felt bad throwing away so much of the mango because a good portion of it is the outer skin. And now it makes cutting them up SO much easier, no need to take the time to peel them beforehand.


For this recipe however, there are no mango skins involved, so you can munch on those while you blend up this refreshing cool drink!

I'm already a fan of smoothies, but a lassi is special. It is so rich, smooth and creamy, sweet and tangy. I have seen Aarti make them on her cooking show, Aarti's party on the Food Network, and am always charmed by the sparkling golden beverage. I quick blended one up, using ingredients I had on hand, and used spices I read were traditionally used in lassies and I knew I would like.

When I tasted it I couldn't help but smile, it was so good! The color is gorgeous and reminiscent of the sunshine. This slightly sweet smelling, cool drink is absolutely a keeper recipe, and I look forward to making it again soon!


Mango Lassi

Serves: 2, or 1 if you are like me:)

1 cup non-fat Greek yogurt (plain/vanilla/honey will all taste good)
1 mango, frozen if possible
1/4th teaspoon ground cardamom
Handful of ice cubes
Splash of milk, until desired consistency
More cardamom for garnish

Blend all ingredients in a blender and garnish with sprinkling of spice.

Cheers,
Suzy

Thursday, May 8, 2014

S'more Cupcakes

These cupcakes are a real treat. Don't let the length of the recipe be intimidating, the end result is worth every bit of work and when taken step-by-step the assembly isn't too difficult. I was pleasantly surprised at how well the whole thing turned out, and on my first try too!
If you are wondering how to go about eating these, ie., with a fork and knife, face-first, one-bite-wonder (not possible), ...roasted over a fire and on a stick... I say to opt for the face-first variation. 
Just like a kid at a campfire...no hesitation. 

To make the Marshmallow-Stuffed Graham Cracker Cupcake:
1 1/2 cups of gluten free graham crackers, ground to a fine flour using a food processor
1/2 cup gluten free flour blend (I used a mixture with ground oatmeal!)
1 1/2 t baking powder
1/2 cup butter
1/2 cup sugar
2 eggs
1 t vanilla extract
3/4 cup milk
---
Marshmallows, the kind used for s'mores
---
Chocolate Frosting
----
Chocolate Squares
-----
Extra GF graham cracker crumbs

Instructions
To Make the Cake:
1.  Preheat oven to 350 degrees F and line a muffin tin with paper liners.
2. Combine the graham cracker flour, Gluten Free flour blend, baking powder, and salt.
3. Separately, cream the butter and sugar together until lighter in color and fluffy. Add one egg at a time, thoroughly combining before adding the second. Stir in the vanilla.
4. Slowly mix the flour mixture to the butter mixture, along with the milk until no lumps remain and all ingredients are combined.
5. Pour the batter into the lined muffin tins, about 1/2 full.
6. Place one marshmallow in the center of each muffin tin and gently push into the batter.
7. Bake for 20 minutes in the pre-heated oven, but please check your cupcakes and adjust time accordingly, they should be golden brown and the marshmallow should appear as though it has been roasted, and are a bit sunken within the cupcake.
8. Once you have removed the cupcakes from the oven, place ANOTHER marshmallow right in the crater that the first marshmallow created. Yup, you read that right. A whole second marshmallow stuffed right there in the middle of each cupcake. This one will get all warm and gooey, making for a welcomed surprise when you take that first bite!...and second, and third... 
9. You can frost the cupcakes that are brimming with marshmallows, once they are cooled. I used a large plastic baggie that was sealed and had the corner cut off, but feel free to apply the frosting however you like, as long as you pile it high!!

I used extra GF graham cracker crumbs and a chocolate square to garnish the already-over-the-top decadent cupcakes.

Please enjoy these cupcakes. They are by no means health food...but are completely delicious and worth sharing for special occasions.


Cheers,      Suzy


This recipe was constructed from a mish-mash of these adapted recipes:
http://www.52kitchenadventures.com/2013/05/23/homemade-smores-cupcakes/
http://www.theshabbycreekcottage.com/2013/04/marshmallow-in-middle-chocolate.html

Tuesday, February 11, 2014

Broiled Grapefruit?

Sounds strange, tastes fantastic!
Its a great way to jazz up a simple breakfast.
Before

After!


There are a lot of variations out there for this tasty treat, but they pretty much are all the same, grapefruit halves sprinkled with sugar and baked in the oven until the top is caramelized. Sounds good to me! :)

Broiled Grapefruit

Yeild: 4 halves

2 grapefruits, halved
4 Tablespoons sugar, brown sugar, vanilla sugar
sprinkle of any spice you like: cinnamon, nutmeg, cardamom, clove
---
Greek yogurt
Honey
Granola

1. Preheat your oven broiler. 
2. Halve your grapefruit. You can make a base oh your grapefruit so they don't roll around on a baking sheet by slicing off part of the bottom peel around the stem of the fruit.
3. In a bowl, combine sugar and spices.
4. Place the grapefruit halves face-up on a rimmed baking sheet.
5. Sprinkle about 1 Tablespoon of sugar and spice on each fruit half.
6. Broil 7-10 minutes, until the sugar has melted and turned a little golden.
7. Remove from oven and allow to cool for a few minutes before serving plain or with yogurt, honey, and granola.

Look how lovely and pink! Just makes for a happy morning!


I enjoyed these with some Greek yogurt and granola.

Mmmm, enjoyed until the very last drop!

I think this recipe is the epitome of sugar and spice and everything nice.
And look! It's perfectly pink, just in time for Valentine's Day!

Cheers,     Suzy