Sunday, October 19, 2014

My Favorite Pie Crust

Since being gluten free I've tried my hand at making a few pies, and I have finally settled on my favorite version! This pie crust isn't the buttery and flaky crust that looks like phyllo dough., this crust is more...cakey, I suppose. It has a soft texture with a crumb. It might make for a less-than presentable slice, but after tasting it, no-one will be complaining about it's presentation.


Pro Tip: Occasionally I will be making a pie, and while I have all the ingredients out, I will make a few to freeze for later. I individually wrap them up in saran wrap and just pile them in the freezer to chill for whatever or whenever I need it.

What I really like about this crust recipe is how versatile it can be. You can use your favorite flours and feel free to make it as sweet or even savory as you want! The crust can even be made vegan with a vegan replacement for the butter and eggs. I have definitely done this in the past, and am happy to report that flax eggs do work well!

1 flax egg =  1 T flax + 3 T hot water


I will often cut out some of the sugar if I am going to freeze the dough,  just because I don't know what it will be made for at a later date, and I may not want it that sweet if it is being used for a savory quiche or something. If the dough will be used for pie, after letting it thaw and I'm rolling it out, I will just add a bit more sugar or syrup on it.


Suzy's Favorite Pie Crust
Yield: 1 crust (double for pie that requires a top and bottom crust)

1 1/2 cup finely ground oatmeal flour
1/2 cup butter or 1/4 cup coconut oil
2 eggs, or equivalent egg replacement (flax eggs do work!)*
2 t baking powder
3-4 T honey/agave/rice syrup
splash of vanilla extract
salt
cinnamon or other spices, if you desire

*Flax eggs do work, combine 2 T flax seed meal + 6 T hot water (allow to sit before combining to other ingredients. I actually prefer the taste and texture of the flax egg to the normal eggs, there's a subtle nuttiness:)
Combine all ingredients in a food process or a large bowl and combine until a dough forms. 
You can freeze the dough now to use later, if you like. Or fill it with your favorite pie fillings and bake!
You need to do a bit of patch-work to lay this crust out, I don't bother rolling it out into the pie dish, I just plop the whole dough ball down and flatten it out using floured (sorghum or a starch) hands.
Fill with favorite filling
Bake at 350° F for 35-40 minutes until the crust is lightly browned. If you pre-bake the crust before adding a filling, the crust won't need to bake as long, maybe 15 to 20 minutes.


Cheers,     Suzy

Tuesday, August 19, 2014

Garden Galette


Is your garden bursting with zucchini yet?...Or your neighbor's garden?


I'm lucky, I don't currently have a garden, but I have a very generous neighbor that gives me zucchini from their garden when it's abundant; and I look forward to the donation every year! Sometimes I even think up and save recipes that contain zucchini specifically to make in late summer because even if my neighbors have a low turn out, it can easily be found at farmer's markets in abundance!


I love gardening, I even had an internship last summer where gardening was a focus for community involvement and outreach. There was a farmer's market that took place weekly with other's who shared the same love of fresh food and community. In all, it was a really neat experience, I was able to learn so much about growing fresh fruits and vegetables, but more importantly I also learned a lot about the community that revolved around the weekly market.


 And for funsies, here is a step-by-step photo-op: 

Finished!


 Now Enjoy!


Being surrounded by such vibrant and fresh food excited me to someday have a garden of my own! Until then, I thank my neighbors very much for their garden produce!!

Here's what I have made with it this year, a Suzy original:)


Garden Galett
3 zucchini, cut into ribbons
1/3 large Vadalia onion, chopped
1/2 cup Parmesan, grated.
Handful of fresh garden herbs (really any kind, I used basil, parsley, chive, and cilantro)
1 recipe for savory (buckwheat) crust

Preheat oven 350 degrees.
Prepare a cookie sheet with parchment and a light coating of cooking spray.
Roll out prepared dough for crust,
Slice zucchini into ribbons, I use a vegetable peeler to make thin slices length wise, and chop the onion and fresh herbs.
Layer vegetables evenly over the crust dough, alternating between vegetables and a sprinkling of cheese.
When done, layering vegetables, fold edges of dough over the vegetables the best you can. I use a fork to help out a bit. It doesn't need to be even, it will just look rustic, right? That's what I tell myself anyway.
Bake for 25-35 minutes. The time will depend on the amount of vegetable you manage to pile on top of the crust.
Allow to cool for a few minutes before cutting into slices.
Enjoy!


This galette is scrumptious straight out of the oven, or cooled. This means you could  make it ahead of time and store in the refrigerator before serving. Either way, it is a delightful garden treat!

Cheers,
     Suzy

Wednesday, August 13, 2014

Crust for a Savory Dish

I use this crust for savory dishes, like this galette recipe that I will post soon


It is versatile and can easily accommodate for whatever ingredients you have or prefer to use.

Suzy Tip: I often add spices to my crust dough. This is another dimension of flavor not often thought about, and the addition makes the whole dish a little bit more special :)

Savory Crust

1 cup buckwheat flour
1 cup almond meal
pinch salt
3 T cold water
3 T coconut oil
any spices you like, I often add a pinch of paprika and/or rosemary depending on what I feel like.

Combine all ingredients. Being sure to keep the dough cool (so the coconut oil remains solid), roll it out.

Suzy Tip for rolling out dough: place the dough onto a piece of plastic wrap, parchment or wax paper and, place another piece of plastic wrap/parchment/wax paper on top (you can even spray so it doesn't stick if your dough is really sticky).


Roll out the dough using a rolling pin or another cylindrical object (between the two papers). Remove the top paper, and place the dough in the pie dish or on the baking sheet
Top or fill with other tasty and wholesome ingredients.
Bake on prepared baking sheet with parchment or cooking spray, at 30 degrees for about 20 minutes, depending on filling (the galette cooks for 25-35 minutes)

Crust!


Other flours I would consider using  in place of buckwheat: (sweet white) sorghum flour, teff flour, corn flour, millet flour, quinoa flour, oatmeal flour (making your own is easy!)
The dough should be pliable, but not too sticky...depending on your flour substitution and humidity you may need to add more water, one teaspoon at a time!

What would you fill this crust with?

Clearly from the photos I made a galette with it, using garden fresh ingredients that I had on hand. It turned out really well, and will definitely be something I'll be making in the future! Be sure to check back, I'll have the recipe up for that soon!!

Cheers,
     Suzy

Thursday, August 7, 2014

These rolls are amazing!


These rolls are amazing! I made them and can't take ANY of the credit for the recipe because there isn't a thing I changed about it. I planned on tweaking the original recipe to make it my own, so I could put it up on my blog as "inspired by..." or "adapted from..."; alas, I didn't change it and here it is. I am/was a bit hesitant to post these on my blog because the recipe is someone else's, but they are so good, and I want to share it with you!

No one would have a problem with these being gluten free. Gluten eaters will love them, and Gluten-free eaters will be blown away at how soft and stretchy the bread is. It's a big deal, I crave that texture. After not having eaten wheat-based bread in...7, 8 years, you forget that glutenous consistency is like. That is, until you knock a loaf off the shelf in the super market and are astounded at the squishy-ness of it. And consequently become consumed with how it springs right back after putting a depression in it from having held it; instead of being frozen or crumbling at the touch, per usual for gluten free bread.

ANYWAY, crave no longer, these rolls will live up to that glorified grocery store loaf.

Though the recipe is straight from Deliciously Organic, I did take my own photos of them!


Look at the stretch in that bread!

In my opinion, one of the best aspects about this recipe, right behind the texture and taste, is that the dough can be kept frozen until you would like to bake some up. Although, then again, keeping the frozen dough on hand might make it just all too accessible... one (I mean me) could get carried away.

Maybe one day I will revisit this recipe and have a version of my own, but they were too good not to share right now. To view the original recipe please follow this link, I did re-type the recipe here for convenience.

As mentioned on the original recipe, and I completely agree...they should only be a once-in-awhile kind of bread, they are full of simple carbs and cheese. Two things, though are fantastic, must not be eaten in large quantities. But these rolls are definitely worth the not-so-hot nutrition label every now and then. Trust me.


Yeild: 12 small rolls, 6 large
Note: I made some large, some small. I used the large rolls as buns for vegan pulled pork recipe coming to this blog soon!

2 cups shredded mozzarella or other mild cheese of choice
1 cup arrowroot (flour/starch)
1/2 t salt
1 t GF baking powder
1 large egg
3 T milk

Preheat the oven to 350 degrees.
Prepare a cookie sheet with parchment paper.
Combine the mozzarella, arrowroot, salt, and baking powder in a food processor.
Add the egg and milk, and blend until a dough forms.
Divide the dough into 12 pieces and roll into balls (they look too little, but they definitely grow while baking)
Note: I froze the dough at this stage and it baked up beautifully! Like I said, almost too easy to keep in the freezer at all times.
Place each dough ball on the baking sheet.
Freeze for 5 minutes (unless you froze them ahead of time, then let them thaw until slightly malleable.)
Remove from freezer and bake 15-18 minutes until they are just turning golden-brown on top.
Serve warm.

Deliciously Organic also gives a neat quick tip that I didn't know: you can make your own GF baking powder by combining 1 part baking soda, 2 parts cream of tartar, and 2 parts arrowroot.

Cheers,
     Suzy

Monday, July 28, 2014

Rain-y Day Food


I love to be in the kitchen when it's raining out. Chopping veggies with the window open so I can hear the rain... it's just so comforting. And this dish was the perfect cozy weather food. It's filling, colorful, warm, and quick to put together with ingredients you may already have in your pantry and fridge. This skillet meal IS BRIMMING with veggies, but I evened that out with some turkey bacon and pure maple syrup. I had to, I couldn't help myself.
Look at that satisfying pile of veg!

This is easily made with substituted veggies, anything you have on hand or like.
And next time I might try a savory version with a balsamic vinegar or reduction instead of the maple syrup, and toss in some spices. Spices was something I over looked this time around, I was thinking about it afterward and a pinch of nutmeg would have complemented the dish well.


Maple Sweet Potatoes and Brussels Sprouts

Yeild: 3-4 servings
1 lb. brussels sprouts, quartered
1 large sweet potato, diced
6 strips (turkey) bacon or about 2/3 cup meat/substitute of choice (it would be great with beans for a vegan version)
1 large onion, diced
2 T maple syrup
Salt and pepper to taste

1. Cook the turkey bacon and set aside. Allow to cool while the rest of the ingredients are cooking. When cool, chop into pieces.
(If you are making a vegan version, cook any meat substitute...even the beans! And set aside.)
2. Carmalize the onions in the bacon drippings that are left in the pan (for a vegan version use any oil you like, olive or even coconut would be great...you only need enough so the onions can caramalize and don't stick to the pan)
3. Add the chopped sweet potato.
4. When the sweet potato is still somewhat firm (does al dente only apply to pasta?) add the quartered brussels sprouts. Allow this to cook for a few minutes until tender.
5. Add the bacon or whatever you previously cooked back into the mix.
6. Drizzle the maple syrup over the cooked veggies. Stir, flip, mix the veggies...do whatever you have to to get that maple-y goodness distributed.
Salt and pepper to taste.
7. ENJOY

Cheers,
     Suzy

Saturday, July 5, 2014

The Banana Cake Challenge

My Mom's makes an excellent Banana Cake, that I and everyone else, LOVES. But I recently decided to try my hand at making one and see how it measured up. Could I make a banana cake equally as tasty, or dare I even imagine better?!?
So the only logical way to figure out how my cake compared to Mom's is to have a Banana Cake Challenge. Yah-huh.


And what a delicious challenge it was (I mean, how bad can bananas, sugar, and butter be?).

Mom's Best Banana Cake

My Banana Cake
Yeild: 8x8-inch cake

1/2 cup sugar
1/2 cup vanilla Greek yogurt (I used non fat), or sour cream
1 1/2 t vanilla extract 
2 tablespoons butter, softened*
2 large bananas, mashed
1 egg (I used a flax egg substitute)
1 cup favorite GF flour mix (This time I used 1/2 cup sorghum and 1/2 cup arrowroot, but next time I'm going to use a mix of 2/3 cup ground oatmeal and 1/3 cup sorghum, just because I like the chewier texture of oats)
1/4 teaspoon salt
1 teaspoon baking soda

Preheat the oven to 375 degrees.
Butter and sugar the sides of and 8x8 inch baking dish.
Combine the sugar, yogurt, vanilla and butter (*coconut oil would *probably* work just fine for a vegan version, of course you could use a vegan butter substitute). Mash the banana and combine with the egg. Combine the banana and yogurt mixture.
Combine the flours, baking soda, and salt. Fold the dry ingredients into the wet ingredients.
Bake for 20-25 minutes until the top is golden brown (If you are using a glass dish, the baking time might be closer to 25-30 minutes). Allow to cool before frosting.
Pre-frosting of my banana cake


Remember how in the last post that I mentioned no pictures were taken of my Mom's Banana Cake, well...there was this one, and only this one. After this picture was taken, both slices were promptly eaten.


I topped mine of with an atrocious amount of the Fluffiest Frosting (You should only make a half batch of this for an 8x8 cake... otherwise you WILL have A LOT of fluffy frosting on your hands that you must do something with...like continue to put on a cake in absurd quantities. Refer to pictures, oye.)

The Verdict:

Drumroll Please!
Mom's Best Banana Cake stands on the first place cake stand! Kuddos Mom, you deserve it!
Did I really think I could out bake THE Best Banana Cake? It's not called the Best Banana Cake for nothing.

I did decided however, that the cake I constructed would be good for those days when you are by yourself and in need of banana cake, because it takes less effort and fewer ingredients to throw together. And it makes an 8x8 cake instead of a 9x13, so that just makes it more of an individual size, right? ;)

What is one irreplaceable recipe that you have?

Cheers,     Suzy

Thursday, July 3, 2014

Mom's Banana Cake

When I think of birthdays, one of the first thoughts that come to mind is of banana cake. My mom used to make banana cake with cream cheese frosting for birthdays when I was a kid, and because of that I have a special sweet spot for mom's homemade banana cake. It wasn't until years later that I learned she liked making banana cakes for our birthdays because she used to eat Sara Lee's banana cake for birthdays when she was a kid, and was trying to recreate the cake! She tried several before baking up this one, and it is SO GOOD! It's cake at it's finest in my opinion, perfectly cake-y and scrumptious. I'm sure the Sara Lee cake is wonderful, but in my opinion Mom's is better because her version is gluten free, just for me! :) Ha!

This all being said, I can NOT believe I didn't take a picture of the final product! It was eaten too quickly to get a good one in, and in all honesty I was busy trying to make a banana cake of my own (check out the next post!). It was made in the morning before company, and polished off right after lunch. G. O. N. E. All done. But, the next chance I get, there will be so many pictures up of this cake, it will be overwhelming.

I've never had the Sara Lee Cake, nor will I get that chance because for starters it's no longer made and it was of course made with wheat; but with Mom's cake I'm not missing out on anything. According to her and other relatives however, it's pretty close to the original beloved Sara Lee Cake.

Mom's Best Banana Cake - Gluten Free
1/2 vegetable shortening
1 1/2 cups sugar
3 eggs, separated
1 cup or 3 medium mashed bananas
1/2 cup buttermilk (or 1/2 cup milk + 1 t lemon juice)*
3/4 cup sorghum flour
3/4 cup potato starch
3/4 cup tapioca
3/4 t xanthan gum
1 t baking soda
1 t baking powder
1 t salt

Cream Cheese Frosting

Preheat the oven 350 degrees Fahrenheit. Prepare a 9x13 " pan (or for a layered cake, 2 9" round pans) with cooking spray and a little granulated sugar.
*If you are using the buttermilk substitute, mix any milk of your choice with the lemon juice now.
Cream together the shortening and sugar. Mix in the egg yolks, then mashed banana and buttermilk.
Combine the flours, baking soda, baking powder, and salt. Now add this flour mixture to the banana mixture and combine until there aren't any more lumps.
Separately, in a new bowl, beat the egg whites until they form stiff peaks.
Carefully fold the whipped egg whites into the banana batter until completely incorporated.
Pour the batter into the prepared baking pan(s) and bake for about 30 minutes until the cake(s) are golden brown on top and a toothpick inserted in the center comes out clean.
Let the cake(s) cool in the pan before removing or topping with cream cheese frosting.

Here's one for the tips and trick's category, instead of flouring the greased cake pan so the cake doesn't stick, on special occasions like this I will sprinkle granulated sugar around the edges. The thin coating of sugar will crystallize a bit when baking and form a little crust around each and every slice of cake, making it just that much more special.

 Like This!

I was also pretty proud of the egg whites that were whipped into perfect little peaks. I think I'm finally getting it down, the trick is to just not quit....they'll get there.


I said this cake was delectable and gluten free, neither one of those things make it health food. Though I like to focus this blog around healthy AND gluten free eats, I also recognize not everyone is a fan of chia seeds and mashed chickpeas in their food like me. This being said, I am a proponent of the "everything in moderation" campaign; and especially when baking for company, using sugar and (as much as it pains me,) vegetable shortening is okay once in awhile.

But be on the lookout, I have quite a few super healthy recipes coming up! Most of them probably contain either chia seeds or chickpeas...if we are lucky, maybe even both! :D

What is your favorite birthday dessert?

Cheers,
     Suzy

Wednesday, June 25, 2014

Fluffiest Frosting


This frosting is reminiscent of clouds. It's SO LIGHT AND FLUFFY! And bakers beware, if you are only making a single layer cake, like in a 9x9 inch pan...and you make an WHOLE batch of this frosting, one of two things are going to happen: 1) you have a good bit of frosting hanging out in your fridge when you are finished frosting your cake or 2) you will have a cake heaping with fluffy frosting.
Guess which outcome I choose. My cake was half of this frosting by volume. I figured, why not? Saying it was a bit much is an understatement, but it was good for a few laughs when cutting into it and seeing the surprise on people's faces when they realized half of their slice was frosting.

I really liked this frosting, it has a really mild flavor and isn't too sweet; making it a perfect base for so many flavor opportunities! You can add spices and extracts to match any flavor profile you are working with, and adjust the sweetness to suit your taste.

The heavy cream is what makes this frosting so light and airy, it is whipped (along with the other ingredients) much like you would do to make your own whipped cream. The ingredients don't seem like they will make so much frosting at first, but after all the air is incorporated, the mixture will double in size.

This is definitely one of the more interesting frostings I have made, even though this version's flavor was plain, the texture was unique. Could you imagine adding some cocoa powder? Chocolate-y clouds of frosting. Yum!
Oh, and I bet you could use full fat coconut milk instead of the whipping cream and maybe even Cashew Cream Cheese for a vegan version. Ohhh.. cocoa and coconut!... pure decadence. Okay, I have to stop now before I bake another cake. Here's the recipe.

Ingredients:
8 oz plain cream cheese
1/2 cup granulated sugar (more or less depending on tastes)
2 t vanilla extract
2 cups heavy whipping cream

Combine the cream cheese, sugar, and vanilla until smooth.
Add the cream (I slowly added it in three batches), using a mixer, start mixing at a lower speed and work your way up until the frosting resembles whipped cream and stiff peaks form.

Recipe adapted from here.

What's your favorite cake-frosting flavor combo?

I have always LOVED banana cake with cream cheese frosting. In fact, a banana cake is what this recipe was tested out on, and that recipe will be up on this blog soon, so report back for that update!

Cheers,
     Suzy


Friday, June 20, 2014

Protein-Packed Oatmeal

I love oatmeal...period. It's a simple sentence, but it says all it needs to say. I'll eat it at any time of day, any way. This probably isn't a new concept, because oatmeal is such a staple in many people's diet. It is healthy, filling, and above all else...easy. It's quick to make and quite affordable.
I've become quite creative with my oatmeal add-ins throughout my college career. Eating in the same caf, with the same food evokes one to get creative with what is available. A few concoctions have elicited brows to be raised by my friends (maybe we'll get into that later), so when I was surprised by one of my roommate's favorite ways to eat oatmeal, I was truly shocked I had never thought of it.
She added a scoop of protein powder to her warm bowl of oats! Genius! Not only will this bowl of oats fill you up, it will keep you full! And as an added bonus, you can switch up the flavors and be okay with having a bowl of chocolate for breakfast!
Of course, after learning of this I have made quite a few variations, but my absolute favorite is the tried and true chocolate!
This isn't really a recipe so much as it is a guideline...add protein powder to oatmeal...BUT I'm going to write a recipe out anyway. Feel free to change quantities and ingredients how you see fit!

I like it so much, it's not just a dorm-room staple. Now that it's summer and I'm not in the dorms, I still make this frequently. It's great after  a work out too.

Protein-Packed Oatmeal
1/2 Cup oatmeal (GF)
1 cup water or almond/soy/milk, extra as needed
1 scoop favorite protein powder

add ins: chocolate chips (because you can never have enough chocolate), cocoa nibs (seen in photos), cocoa powder, berries (of course!), unsweetened coconut, walnuts/almonds and the like, ohhh....any nut-butter of choice. <- This would just taste like a favorite chocolate-covered peanut butter cup of mine.

1. Combine oatmeal and liquid and cook using method of choice, in a microwave or over the stove. Heat until the liquid is absorbed and the oats are cooked through.
2. Transfer cooked oats to a bowl (only if you used the stove), and stir in your protein powder until thoroughly combined.
3. Add additional water if the consistency is too thick.
4. Sprinkle with optional toppings and enjoy!

Do you use protein powder? What do you put it in?
Cheers,      Suzy

Thursday, June 5, 2014

Blueberry Buckles and other Fruity Things

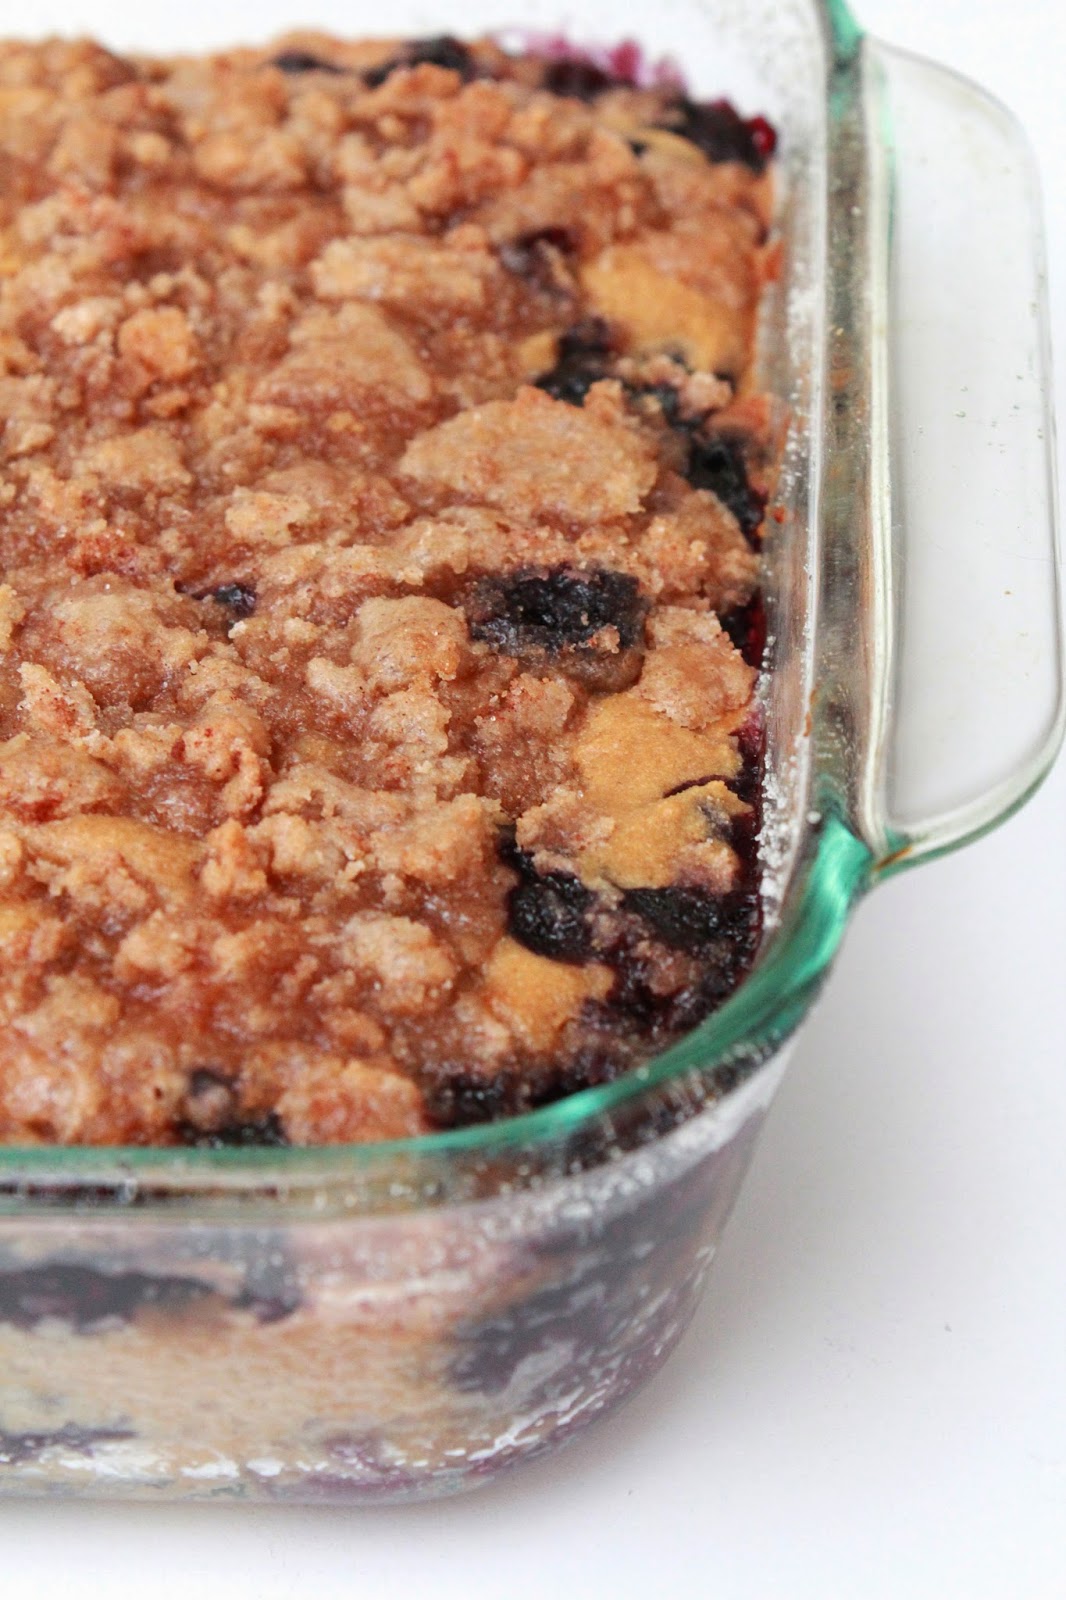
Something I have realized over my casual culinary career, that never ceases to surprise me, is how good fresh fruit and brown sugar taste together.  If a recipe calls for those two things it probably won't be bad. I love baking fruity desserts, and I was surprised when I realized how few (read: zero) I had on this blog. BUT this is about to change my friends because, this Blueberry Buckle encompasses both fresh fruit and brown sugar, and it tastes amazing (I already tested it for you,  no guess work on this recipe!).

A buckle  is similar to coffee cake with fruit baked in the cake batter and topped with a sugar-y cinnamon-y topping. After the buckle is baked, the cake can be seen through cracks made by the topping, and it looks as though the entire cake itself had buckled. This is one theory behind why this delicious dessert is called a buckle, but whatever you call it, I'd eat it.
 I served this dessert along side freshly whipped cream and a Bursting Blueberry Compote, because more blueberries is never a bad thing. Serve this to some favorite company on a temperate summer evening, and I can guarantee you will have a good afternoon in the making.

Blueberry Buckle

Yeild: 1 9x9 inch dish (~9 portions)
Cake:
1/2 cup sugar
1/4 cup brown sugar
1/4 cup butter of choice (I use a yogurt butter from a tub)
1 large egg (or egg substitute)
1/2 cup milk of choice
1/4 cup Plain Greek yogurt (or sour cream)
2 cups GF flour blend:
       1/2 cup tapioca starch*
       1/2 cup brown rice flour*
       1 cup sorghum
       (optional) 1 t xanthan gum
2 t baking powder
1/2 t salt
2 cups blueberries (both fresh and frozen work, you could even try raspberries or your favorite fruit!)

Topping:
1/3 cup sugar
1/4 cup brown sugar
1/3 cup GF flour (brown rice)
1 Tablespoon cinnamon
1/4 cup butter of choice

1. Preheat oven 375 degrees F, and butter (and sugar-coat) the edges of a 9x9 inch pan
2. For the Cake: cream the butter and sugars until fluffy. Add the egg, milk and yogurt and mix well.
3. Combine the flours and mix in the baking powder and salt. 
4. Incorporate the dry mix into the wet ingredients.
5. Gently fold in the blueberries.
6. Pour the batter into the prepared pan.
7. Combine all the topping ingredients and evenly distribute by crumbling it between your fingers ontop of the cake batter.
8. Bake for 35 minutes until golden brown, and a toothpick comes out clean.

This is wonderful served either warm or cold.
I served it at room temp with this freshly whipped cream and this Bursting Blueberry Compote, delish!
BUT, if I were to serve it warm from the oven, I think vanilla ice cream would be a great accompaniment.

*Notes: next time I think I would like to use arrowroot starch in place of the tapioca and oatmeal flour in place of the brown rice, just because I like these two ingredients (personal preference) and I tend to have these more readily on-hand. But I can't attest to the results because I haven't make it yet...hmmm, is that an excuse I now have to make this again? :)
And a blueberry lemon/orange version of a buckle might be nice, by adding a teaspoon of zest to the cake batter before baking!

Cheers,
      Suzy