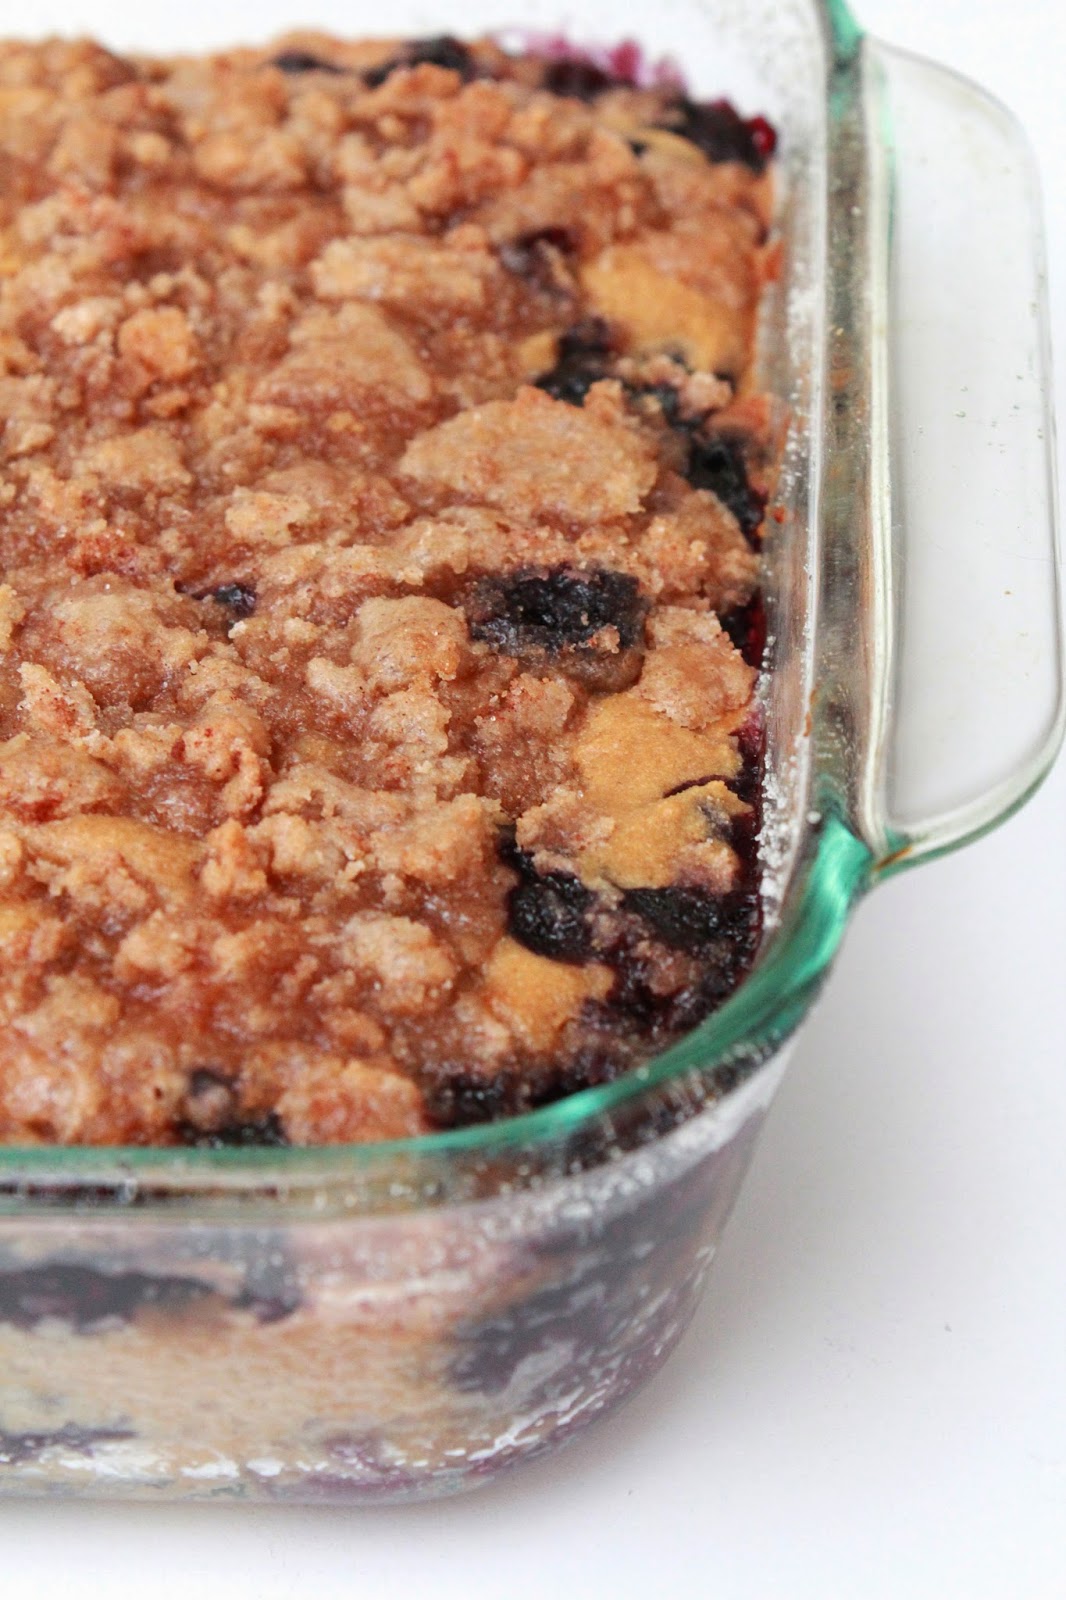
Showing posts with label Fruit. Show all posts

Thursday, June 5, 2014

Blueberry Buckles and other Fruity Things

Something I have realized over my casual culinary career, that never ceases to surprise me, is how good fresh fruit and brown sugar taste together.  If a recipe calls for those two things it probably won't be bad. I love baking fruity desserts, and I was surprised when I realized how few (read: zero) I had on this blog. BUT this is about to change my friends because, this Blueberry Buckle encompasses both fresh fruit and brown sugar, and it tastes amazing (I already tested it for you,  no guess work on this recipe!).

A buckle  is similar to coffee cake with fruit baked in the cake batter and topped with a sugar-y cinnamon-y topping. After the buckle is baked, the cake can be seen through cracks made by the topping, and it looks as though the entire cake itself had buckled. This is one theory behind why this delicious dessert is called a buckle, but whatever you call it, I'd eat it.
 I served this dessert along side freshly whipped cream and a Bursting Blueberry Compote, because more blueberries is never a bad thing. Serve this to some favorite company on a temperate summer evening, and I can guarantee you will have a good afternoon in the making.

Blueberry Buckle

Yeild: 1 9x9 inch dish (~9 portions)
Cake:
1/2 cup sugar
1/4 cup brown sugar
1/4 cup butter of choice (I use a yogurt butter from a tub)
1 large egg (or egg substitute)
1/2 cup milk of choice
1/4 cup Plain Greek yogurt (or sour cream)
2 cups GF flour blend:
       1/2 cup tapioca starch*
       1/2 cup brown rice flour*
       1 cup sorghum
       (optional) 1 t xanthan gum
2 t baking powder
1/2 t salt
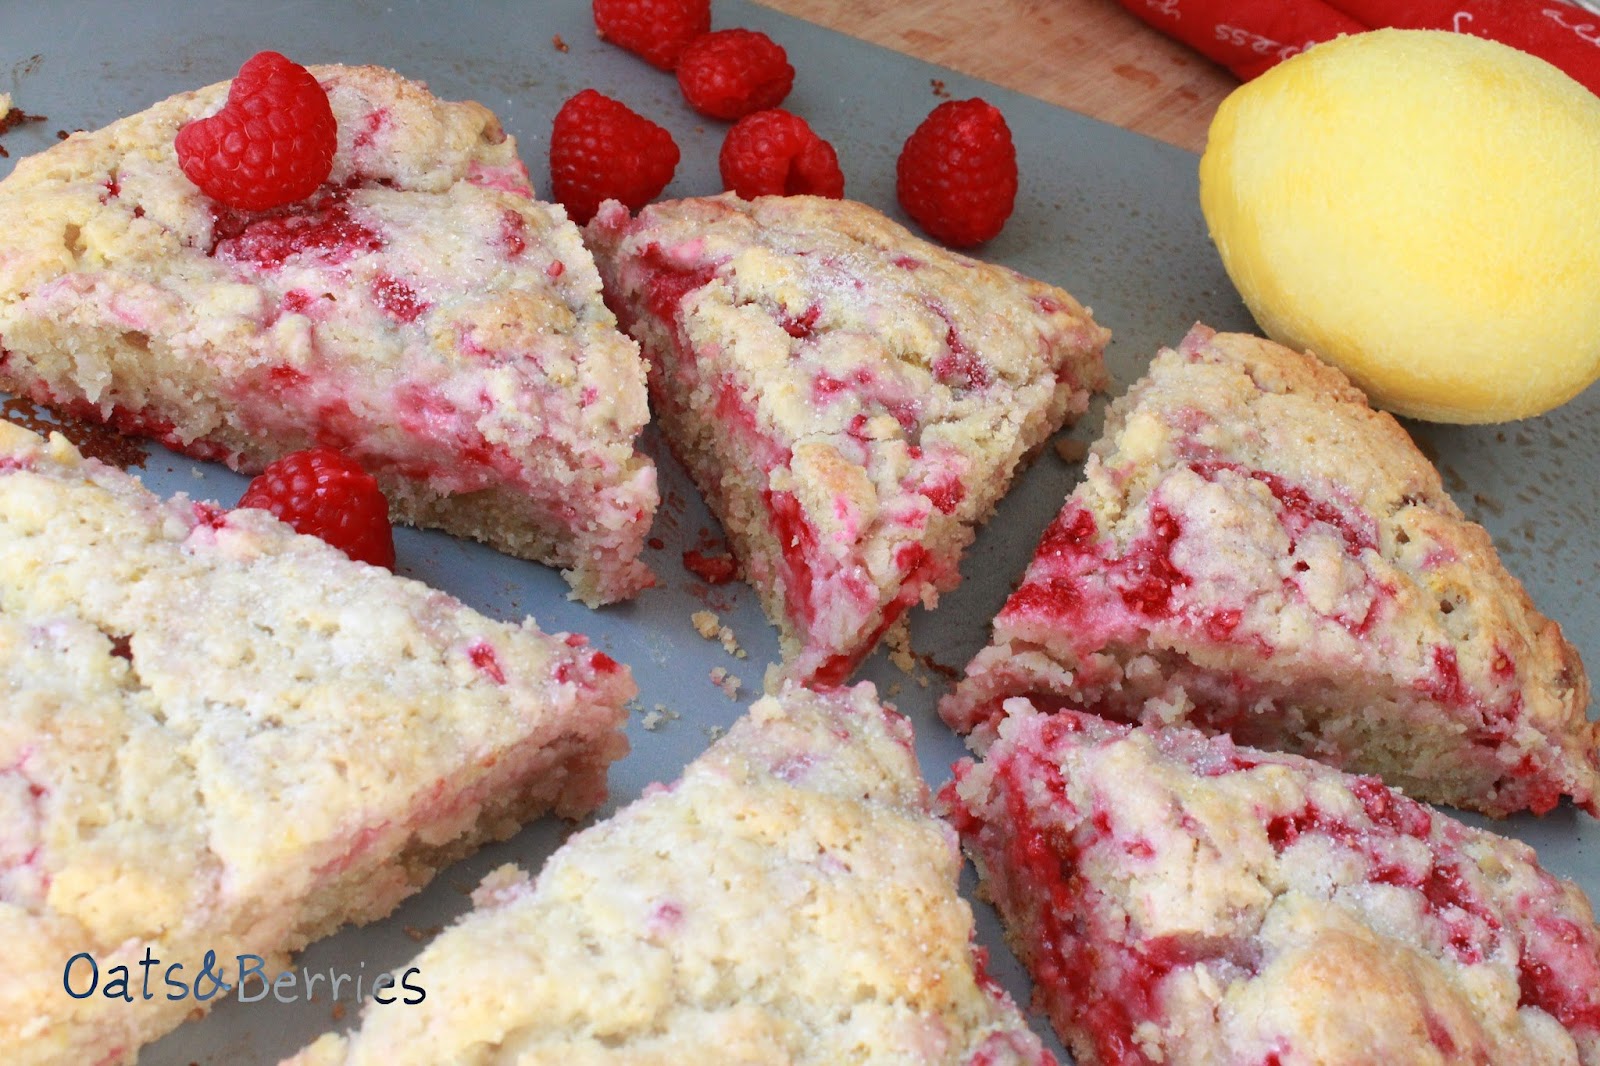
2 cups blueberries (both fresh and frozen work, you could even try raspberries or your favorite fruit!)

Topping:
1/3 cup sugar
1/4 cup brown sugar
1/3 cup GF flour (brown rice)
1 Tablespoon cinnamon
1/4 cup butter of choice

1. Preheat oven 375 degrees F, and butter (and sugar-coat) the edges of a 9x9 inch pan
2. For the Cake: cream the butter and sugars until fluffy. Add the egg, milk and yogurt and mix well.
3. Combine the flours and mix in the baking powder and salt. 
4. Incorporate the dry mix into the wet ingredients.
5. Gently fold in the blueberries.
6. Pour the batter into the prepared pan.
7. Combine all the topping ingredients and evenly distribute by crumbling it between your fingers ontop of the cake batter.
8. Bake for 35 minutes until golden brown, and a toothpick comes out clean.

This is wonderful served either warm or cold.
I served it at room temp with this freshly whipped cream and this Bursting Blueberry Compote, delish!
BUT, if I were to serve it warm from the oven, I think vanilla ice cream would be a great accompaniment.

*Notes: next time I think I would like to use arrowroot starch in place of the tapioca and oatmeal flour in place of the brown rice, just because I like these two ingredients (personal preference) and I tend to have these more readily on-hand. But I can't attest to the results because I haven't make it yet...hmmm, is that an excuse I now have to make this again? :)
And a blueberry lemon/orange version of a buckle might be nice, by adding a teaspoon of zest to the cake batter before baking!

Cheers,
      Suzy


Bursting Blueberry Compote

This is by no means an exact recipe, but the flavors complement each other so well! But please adjust the ingredients according to your own tastes!


2 cups Blueberries (fresh or frozen)
2 t Orange Zest
1/2 t Ground Clove
1/4 t Ground Cardamom
Splash of vanilla extract
water

Put the blueberries in a saucepan and add the water and orange zest. Allow the mixture to simmer for about half an hour until it is reduced and the blueberries have burst. Add the ground clove, cardamom, and vanilla extract and stir.
Take of the heat and serve warm or store in the refrigerator until ready to eat!


This is good warm, cold, or re-warmed in the microwave. Serve on top of yogurt, ice cream, cake, or oatmeal...or eat it straight with a spoon. I'll admit, I did that.

Cheers,
      Suzy

Saturday, May 10, 2014

Mango Lassi, Sunshine in a Glass

Did you know you can eat the skin of a mango?  You can! I happen to like the taste, quite a bit actually. I found out that the skin was edible in high school when my friend who spends her summers in India told me you could. I was cutting one up as a snack to have with tea, a favorite pass time after school (weren't we classy!?), when I served her just the sweet orange inside, and she gave me a funny look. She then told me how in India people will eat mangoes like apples, skin and all. Of course I immediately had to try it and was soon gnawing on the tough, bright green, red, and freckled-yellow peel. I am so glad that she informed me of this, I always felt bad throwing away so much of the mango because a good portion of it is the outer skin. And now it makes cutting them up SO much easier, no need to take the time to peel them beforehand.


For this recipe however, there are no mango skins involved, so you can munch on those while you blend up this refreshing cool drink!

I'm already a fan of smoothies, but a lassi is special. It is so rich, smooth and creamy, sweet and tangy. I have seen Aarti make them on her cooking show, Aarti's party on the Food Network, and am always charmed by the sparkling golden beverage. I quick blended one up, using ingredients I had on hand, and used spices I read were traditionally used in lassies and I knew I would like.

When I tasted it I couldn't help but smile, it was so good! The color is gorgeous and reminiscent of the sunshine. This slightly sweet smelling, cool drink is absolutely a keeper recipe, and I look forward to making it again soon!


Mango Lassi

Serves: 2, or 1 if you are like me:)

1 cup non-fat Greek yogurt (plain/vanilla/honey will all taste good)
1 mango, frozen if possible
1/4th teaspoon ground cardamom
Handful of ice cubes
Splash of milk, until desired consistency
More cardamom for garnish

Blend all ingredients in a blender and garnish with sprinkling of spice.

Cheers,
Suzy

Tuesday, February 11, 2014

Broiled Grapefruit?

Sounds strange, tastes fantastic!
Its a great way to jazz up a simple breakfast.
Before

After!


There are a lot of variations out there for this tasty treat, but they pretty much are all the same, grapefruit halves sprinkled with sugar and baked in the oven until the top is caramelized. Sounds good to me! :)

Broiled Grapefruit

Yeild: 4 halves

2 grapefruits, halved
4 Tablespoons sugar, brown sugar, vanilla sugar
sprinkle of any spice you like: cinnamon, nutmeg, cardamom, clove
---
Greek yogurt
Honey
Granola

1. Preheat your oven broiler. 
2. Halve your grapefruit. You can make a base oh your grapefruit so they don't roll around on a baking sheet by slicing off part of the bottom peel around the stem of the fruit.
3. In a bowl, combine sugar and spices.
4. Place the grapefruit halves face-up on a rimmed baking sheet.
5. Sprinkle about 1 Tablespoon of sugar and spice on each fruit half.
6. Broil 7-10 minutes, until the sugar has melted and turned a little golden.
7. Remove from oven and allow to cool for a few minutes before serving plain or with yogurt, honey, and granola.

Look how lovely and pink! Just makes for a happy morning!


I enjoyed these with some Greek yogurt and granola.

Mmmm, enjoyed until the very last drop!

I think this recipe is the epitome of sugar and spice and everything nice.
And look! It's perfectly pink, just in time for Valentine's Day!

Cheers,     Suzy


Sunday, February 2, 2014

Blueberry Strawberry Banana Baked Oatmeal!

Another lovely combination of Oats and Berries!
It just never gets old.

I found a a really good looking recipe for baked oatmeal from Annie Eats, and changed the procedure quite a bit to match more of that found on Deliciously Ella. I really like the idea of soaking the oats before cooking them, so that they have time to absorb some of the liquid. I also added some strawberries and mashed one of the bananas before stirring it into the mixture.
This has such a pretty presentation, and was lovely to have for breakfast with family.
I served it with Greek yogurt and extra cut-up fruit. Yummm!

Blueberry, Strawberry, Banana Baked Oatmeal

1 1/2 cups old fashioned rolled oats
½ tsp. baking powder
2 T. ground cinnamon
Pinch of salt
¼ cup maple syrup or honey
1/2  cup skim milk or almond milk
1/2 cup water
1 large egg, lightly beaten
1 tsp. vanilla extract
2 ripe bananas, one mashed, the other thinly sliced
1 cup blueberries (fresh or frozen), divided
1 cup strawberries, halved
handful of walnut pieces, optional
Directions:
Preheat the oven to 375˚ F.  Lightly grease a 2-quart baking dish. 
In a bowl, combine the rolled oats, baking powder, cinnamon and salt.  Stir to combine. Combine the maple syrup, milk, water, egg, vanilla, and the single mashed banana. Mix the wet ingredients and the dry ingredients and let sit for a few minutes while you gather the remaining toppings and add-ins. Mix in half of the blueberries, and pour the mixture into the prepared baking dish. Sprinkle the nuts, strawberries, remaining sliced banana and blueberries over the top.  Bake for 35-40 minutes, until the berries on top have cooked, the oats are golden and set. 
I served this immediately, nice and steamy! The Greek yogurt helped to cool it down quicker.
It was like eating an inverted fruit crisp, lovely.

Cheers,
     Suzy


Wednesday, January 29, 2014

Blueberry Muffin Protein Bar

Yup, one bar, two favorite eats. Yum!
These really do taste like the fluffy, buttery, fresh blueberry studded muffins that one drools over at any coffee shop. Though the taste is spot on, the texture couldn't be more different. These are dense and chewy, with an added bite from the freeze-dried blueberries...the consistency that I want in a protein bar.

Blueberry Muffin Protein Bar

1 C finely ground oat flour
6 scoops (132g) vanilla protein powder
1 t vanilla extract
1 t Princess Cake and Cookie Flavor by LorAnn Oils
2 t flax seeds

1/3 C almond nut butter
*1/2 t lemon juice (optional)

1 C nonfat dry milk
1/2-3/4 C water, depending on consistency
1 C freeze dried blueberries

Prepare an 8x8 inch dish with cooking spray or parchment.
Add all dry ingredients to a large bowl. Lightly mix together and make a well in the middle of the mix. Add the wet ingredients into the well and lightly stir to break apart the nut butter before incorporating into the rest of the batter. Gently fold freeze dried blueberries into the batter. Press the dough into the prepared baking dish. Cover and let rest in the refrigerator for a few hours or overnight before cutting into 9 squares. Store in the fridge, or in the freezer for longer term.
You can individually wrap these in wax paper and pull them out from the fridge for snacks on the go, or you can leave them in the dish like I do and cut chunks away at your leisure.


Happy Breakfast to me! ...and after exercise snack, ...and lunch. Because they're that good. I also really enjoyed them with this Cashew Cream 'Cheese' smudged on top, for more protein goodness. Now they just taste pretty much like a blueberry cupcake with cream cheese frosting. Oh yes, I went there. And I probably will again tomorrow.
But I can share! So here is my new favorite recipe! :)

Yum, a modified cupcake ;)
A note about the Princess Cake and Cookie Flavor:
This is one of those fun buys that I got at a store once, the flavor itself I can only describe as that of a sweet treat and helps give a decadence to these bars. You of course could add any additional flavor you have or would like, from lemon juice to a bit of coconut. These variations I have not *yet* tried, but writing about them is making me think I'm going to be making another batch of these really soon.
If you try another variation, let me know!

What flavor mash-up would you like to see in a protein bar?

Cheers,

     Suzy

Sunday, July 21, 2013

Fan-FREAKING-tastic Bars

Oh yes they are!
It was declared on more than one occasion... by more than one person...
I'll try to convey the greatness of these bars with pictures and as many adjectives as possible; but just so you know, pictures and words can only say so much and you should just make them and let them speak for themselves.

They are chewy and crunchy, yet soft because they are no bake; they are fruity, nutty, sweet, a tad salty, and a little chocolaty. 
They are healthy. They have healthy fats, provide plenty of fiber, and only use wholesome ingredients. 
You can customize them to your heart's delight, they are Gluten Free (of course), Vegan, and incredibly easy to put together.
Did I mention they have chocolate? 
And they are FILLING! So worth it.

I had saved the original recipe quite a while ago, but it took a close friend of mine to make them first and get met to dig the recipe out and make them myself! Oh, what I've been missing out on!

The recipe is from 86 Lemons and I haven't changed it too much because quite honestly, they are perfect.
Someone was being sneaky and taking one from my background

Peanut Butter Chocolate Breakfast Bars
1 1/2 cups rolled oats (use gluten-free if desired)
1/2 cup flax seed meal1/4 cup chia seeds1/4 cup sunflower seeds1/3 cup pumpkin seeds1 cup cashews, almonds, walnuts1/2 cup honey/pure maple syrup/agave1 cup natural nut butter
1/2 cup vegan chocolate chips or coco nibs

1/2 cup dried cherries/blueberries/cranberries

Line and 8x8 inch dish with parchment paper. Combine oats, seeds, and nuts in a large bowl. Add in agave, etc. and nut butter of choice, and gently fold until all ingredients are incorporated (you may need a bit more honey/maple/agave depending on humidity and other ingredients used). Finally, fold in chocolaty and fruity add-ins until thoroughly mixed in. Dump the dough into the lined baking dish and spread evenly using a spatula. 
Let the bars chill out and firm up in the fridge for a couple hours or overnight (or in the freezer, for like, an hour; As 86 Lemons suggests, for those of us who just cannot wait until tomorrow). 
Cut into (12/16) squares.
Enjoy! 
Devour!
Make more!!

Sunday, July 7, 2013

'Tis the Season for Strawberries!


I have had a blast this summer cruising local farmer's markets! Everyone is so friendly and enthusiastic about the bountiful produce and other specialty goods like honey and soaps! I have really enjoyed learning about new ingredients that are grown locally and how to incorporate them in recipes. The strawberries have been lovely these past couple of weeks, and naturally I have used them in everything from simple oatmeal to a pie that I have a feeling will be made again very soon!
This time I pureed the strawberries with rhubarb and baked up some oatmeal breakfast bars (or rather slices because I used a pie plate), but I'm looking forward to blending different combinations of seasonal fruit, like peaches and blueberries! 
Look at the brilliant pink color!


Strawberry Rhubarb Oatmeal Bars
Yields 1 8x8-inch pan (or 1 pie plate...just in case you run out of 8x8" dishes, like me)
1/3 cup applesauce
1/4 cup brown sugar
1 T flax meal + 3 T warm water
1/4 cup honey/ maple syrup 

1 t Vanilla extract
1 1/2 cups old fashioned oats
1 cup oat flour
1/2 teaspoon baking soda
1/2 teaspoon salt 

1 cup strawberry rhubarb puree*


*3/4 cup strawberries + 1/2 cup chopped rhubarb + 1 T honey/maple syrup, pureed in food processor
Preheat oven to 350 degrees F (180 degrees C). Lightly grease an 8x8-inch pan.
In a large mixing bowl, mix together applesauce and sugar. Add the flax and water, honey, and vanilla extract. Stir in the oats, flours, baking soda, and salt. Spread 3/4 of the batter into the bottom of the prepared pan. Pour the strawberry rhubarb puree evenly over the top. Crumble the remaining 1/4 of the batter on top.
Bake for 25-30 minutes, or until lightly browned. Allow to cool slightly in pan before serving.

Adapted from here.

What do you like to find at the farmer's market?


Cheers,
Suzy

Thursday, May 2, 2013

The Green Smoothie

Everyone has one.
They are stark in color, undoubtedly healthy, and deceptively tasty.
And unlike the green rugs of the 70's this shade will always be in style. Some may consider them the Holy Grail of Health, but many call them breakfast.
And they all have one thing in common, greens!

This is my go-to Green Smoothie.

Green Smoothies have become all the rage, and when you have a good one, you understand why. I like to use spinach in my smoothies, I think it blends up really well and even adds a creaminess. Two other necessary ingredients are green grapes and almond milk. Just add ice, blend, and you have yourself a darn good smoothie! But, I can never leave things well enough alone, and I generally have a grocery list of other add ins. That is the beauty of these dazzling drinks is that you can customize them to what you are in the mood for that day, or what is available.
The almond milk tones down the greens a bit, so it gives you a good excuse to add more spinach! The grapes add a nice touch of sweetness and an added boost of fiber, if you use green grapes it keeps with the green theme. I also REALLY like adding green figs when they are in season, they're just so tasty.

This isn't really a recipe, its more of a guideline that I tend to follow
Yield: 1 smoothie

Handful or two of spinach, or however much you are comfortable using
1 cup vanilla almond milk, sweetened or unsweetened
1 cup green grapes, with skin on
1/2 banana, frozen*
1/2 cup vanilla yogurt (optional)
2-3 green figs (optional)
1 cup of ice cubs


Add all ingredients into a blender and blend on high until smooth.


*It's helpful to peel and cut a few banana's in half before storing them in the freezer for easy smoothie making. If you don't have frozen bananas readily available, just add more ice.

Note: I have yet to do this, but I if you were to freeze the grapes it would help to thicken the smoothie. And if you're like me, I like my smoothies to be the consistency of to the point were I need a spoon to eat it.

Thursday, February 14, 2013

Dazzling Raspberry Cream Scones

Happy Valentines Day!

I've always liked Valentines Day. I look forward to the heart decorations and the nice gestures that people do for each other. It gives a good excuse to pull out the construction paper and glitter, which is always time well spent. And in the culinary world, Valentines day is a great excuse to bake something for someone, like these scones.
These scones are bursting with flavor and delicately sweet. The raspberries and lemon zest combine to lend a touch of tartness, but is mellowed by the cream that really pulls this recipe together. I thought all the flavors complimented each other really well and would be an excellent treat to share with anyone, especially over tea and coffee.
I adapted this recipe from The Family Kitchen at Babble

Raspberry Cream Scones

Yield: 6 large scones
(you could easily make 12 baby scones, just divide dough into two mounds before baking.)

Ingredients:
2 C gluten free flour blend
1/3 cup sugar, plus extra for sprinkling on top.
1 T baking powder
1/2 t salt
zest from 2 lemons
2 cups fresh raspberries
1 1/4 cup heavy cream, plus extra for brushing on top

Method:
Grease a cookie sheet and set it aside.
Preheat your oven to 350.
In a bowl, combine all dry ingredients and lemon zest. Toss the raspberries in to coat with dry ingredients. Pour in the cream and carefully fold mixture, making sure to not over mix.
Put down some parchment paper and lightly dust the surface.
When the dough starts clumping together, turn it out onto the floured parchment and form into a mound and flatten into a disc about 2 inches thick.
Pick up the disk and place it onto your cookie sheet. At this point I cut my disk evenly into 6 triangles, but I left them in the disk formation to bake.
Brush the dough with extra cream and sprinkle with sugar.
Your baking time will be longer if you keep them together versus if you were to pull them apart to bake as individual scones. My scones baked for about 40 minutes until the tops were lightly golden. If you separated them, they should only need about 15 minutes in the oven.
When they are still warm from the oven, I will admit, I sprinkled them with a little extra extra sugar, because I wanted them to sparkle :)
If you left them in the disk formation you will need to re-cut them because they will mostly bake back together. I found this was easiest when they were still warm.

Like these scones, people think of Valentines day as either being a sweet holiday worth cherishing or a tart day they would rather get over with. 

Do you fancy Valentines Day?

Like I said, I'm a bit biased because I like the hearts everywhere.

Doesn't that picture just say, "go ahead, take a bite!"
Serve with some freshly whipped cream!